How to wire two separate switches and lights using the same power source. It’s not something uncommon for us to see people having two or more switches and lights that are connected with only one major source.
In fact, it is very common for you to see this in many homes because it saves a lot of time for people. In most cases, the major source is an electrical panel of the home that has the potential to take a lot of loads.
It is very much possible for you now to get in switches either in the same box or in two different boxes as per your wish, but if you want to go for the second option of different extra boxes, then keep in mind that you will be in need of extra work to run the circuit cable in the passage between two boxes which can be messy look wise as well to see cable from naked eyes.
Two light switches that are connected to one major source can also be used in facilitating a single light fixture as well. However, in that layout, switches can be confused into three-way switches.
How to wire two separate switches and lights using the same power source
In the following points, you will be learning how to how wire two separate switches and lights using the same power source.
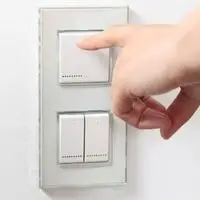
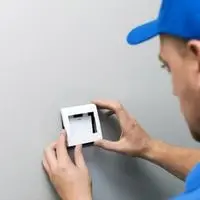
Installing electrical box
The first and foremost point you need to be observant of is you install appropriate electrical boxes so that you can get the switches and lights in them.
If you want to use only one box to get the switches in it, then use a double gang electrical box. If you want to use it in different locations of the house, then obviously, you are in need to have separate boxes for it.
Install electrical cable
Take a 12 gauge electrical cable in your hand and then make it run down between each of the switches and obviously lights that are in their control.
If you are installing separate boxes in different locations, then you have to drag each cord by the rear of one of the electrical boxes.
Rip cable apart using a knife
After dragging each chord by the rear of one of the electrical boxes, then you have to rip apart each cable using a knife, then you have to make a separation of wires, and finally, you are required to disconnect the 1/2 inch from the end of each of the wires.
Every fixture of light has black wires, white wires, and ground wires. Switches have black chord wires, white cable wires, and bare cable wires.
Connect light fixture

Now what you need to do after understanding this is connected the light fixtures by wiring their black wires to the black chord wire, then you have to wire the white wires of fixtures with the white chord wires.
Take the plier in your hand and, with its help, make the wires twist, and then you should put a cap on each of them and then screw them so they remain fixed.
Drag the other point of every cable by the rear of the electrical box. This is all for the switch that controls it.
Rip and remove wires
Then using a knife, you are required to rip apart the wires and then remove the wires. Insulation of 1/2 inch has to be removed from the black wire and then get its connection with the foundation brass terminal that is in the switch with the help of a screwdriver.
Use a chord
Take out a 12 gauge chord from the major source that is probably an electrical panel in your home, but be mindful of the fact that you have already switched off the main power, and also, there has to be deadness in the chord.
Get it in by the rear of one of the boxes that are electrical, and then rip apart the wire.
If you have electrical boxes installed in different locations of the home, then you have to repeat this step again with the second 12 gauge chord from the major power source.
Opening up a chord
With the help of a simple knife, cut to open up the extra size of the chord, and with that, you have to disconnect the bare and black wires.
From both points of the black wire, you have to detach the 1/2 inch of the insulation. In case you have installed only one box, and in that, you are getting two switches, then you have to get the other black wire prepared.
Parts joining

Join one point of the wire to the terminal that is on top of the switch that is first.
Turn the other point altogether with the black wire and turn the black wire from the chord that you see going to the switch that is second in order to form a pigtail. With the help of a screwdriver, fix a wire cap on the pigtail.
Use 6-inch wire
If you have installed only one electrical box, then make use of a wire that is 6 inches and join it to the terminal at the top of the 2nd switch. In the case of the same electrical box, you will get to see the following
- Three black wires are forming pigtails.
- 2-6 inches wires you will see that coming from the switches
- 1 circuit wire
Using the same procedures makes almost the same pigtails of ground wires. Join the wires of 6 inches to the green ground terminal.
Turning Point altogether
Turn the other point altogether with the points of three bare wires that are present in the electrical box.
In case you have installed only one box for two switches, then you have to join the ground terminals along with one wire that is 6 inches and then turn the wire altogether with the other two wires.
Finally, now you are required to twist all the white wires that are there in the electrical box and then cap them and fix them using screwdrivers.
Conclusion
In this article, you have learned how to wire two separate switches and lights using the same power source.
You have also learned you can also install two different boxes for this purpose.
Related Guides