
Adding a light fixture and switch to an existing circuit. Light fixtures are a basic source of illumination. They use electricity for activation.
Several light fixtures consist of one or more lamps. They are widely used in offices and homes as an important source of illumination.
Many street lights also consist of these light fixtures or lamps. They do not require any mechanical energy to function.
Adding a light fixture and switch to an existing circuit

They depend on electricity to glow and produce a glimpse of light.
Several table lamps, torches, and standard street lights consist of these light fixtures. It is quite easy to connect the light to existing circuits.
Double light can be connected to a single electrical circuit.
Method to add a light fixture and switch to the existing circuit
To add a light fixture and switch to the existing circuit you will need several pieces of equipment and tools.
Some of those tools include a hammer, switch, screwdriver, electrical wire, metallic and non-metallic cable, remodel ceiling box, more than two electrical testers, cutter, stripper, and both orange and red wire connectors.
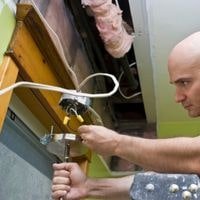
Great care should be taken while connecting these light fixtures. First, you should turn off the electricity to break the circuit.
Severe electric shock
You can get a severe electric shock while connecting the light fixture in case you have not followed all the precautionary measures. After disconnecting electricity cut the wooden ceiling with the help of an iron saw.
Eliminate all the screws that are responsible for holding the switch on the wall plate.
Check the presence or absence of light by using two-prong electrical testers. These electrical testers will turn up red if the electricity has not been disconnected.
But if there is no appearance of red color on touching the screws of the electrical plate then it is a clear indication of the disconnection of electricity.
This test will be repeated on every screw to assure that there is no connection to electricity. After this electricity check eliminates all the screws attached to the switchboard.
Lose the wires present beneath the switchboard. Wire connectors are present in the form of twisters. First, you should uncoil the white wires.
All copper wires should be disconnected for the attachment of light fixtures. Use a hammer to remove all the nails attached to the switch box.
After loosening the nails carefully pull the switchboard from the wooden ceiling.
Attachment of additional switch
For the attachment of an additional switch to the switch, the board makes some extra space. Take metallic and non-metallic cable wires about 12 nm in length.
Adjust these non-metallic wires at the location of the new switch. Coil these electrical wires. After proper twisting of wires pushes them back into the wooden ceiling.
Now attach all the circuit wires to the desired position. Take an insulation sheath to cover the exposed parts of the electrical wire. Use the manufacturer’s directions to adjust the new light fixture. After the attachment of the light fixture use nails to screw the switchboard.
How to add a light fixture to existing circuit?
Related Guides