Kitchen sink leaking around edges. Kitchens are the most useful part of the home. as our life depends on food, and food depends on the kitchen; no doubt, the kitchen needs proper care and protection and needs routinely cleaning services.
For kitchen cleaning purposes, we all use the most important part of the kitchen is Faucet. People use faucets for many purposes.
A lot of us invest a heavy amount of money in kitchen faucets and countertops, and for sure, we do want to protect our investment at any cost.
Sometimes you can face the problem of a Kitchen sink leaking around the edges, and at that time, you start wondering what is the reason behind it, and you start worrying about the next investment that you have to put up on repairing this leak by calling a plumber.
Then stop because, in this article, we are going to help you identify the problem as well as repair the leak.
We are excited to prevent you from the plumber that will drain your money for this simple problem that you can do by yourself.
Kitchen sink leaking around edges

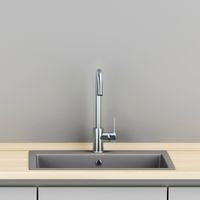
When faucets are installed with countertops then there is the proper seal applied on the edges of the sink to prevent it from leaking. Whether the edges are top-mounted or they are bottom-mounted, they are sealed properly.
That seal is strong enough to hold the faucet with the countertops, and to protect it from leakage over time, that seal starts cracking.
If that seal doesn’t get proper maintenance, then it will get even worse, and your faucet will start dropping problems in different parts of your kitchen due to leakage.
The main reason is a cracked seal around the edges of the kitchen sink and you have to focus on repairing the seal as soon as possible because if you delay fixing it, then it can get even worse.
After all, leaking water will make its way through the wood parts of the kitchen, and it will cause more damage and, yes, more investment as well.
Repairing the seal
To repair the seal, you have to go through some easy steps that will help you to solve your problem by yourself.
Nut before that, it is recommended to collect and arrange some supplies and tools so that you can go up easy while going through the fixing process.
Things you’ll need:
- Razorblade with straight edges
- Knife
- a piece of cloth
- painter’s tape
- aldehyde alcohol
- squeezable sealing tube/sealing gun
- Pair of rubber gloves
Step 1. Preparing your work area
You have to prepare your area so that you can do this fixing process more efficiently and properly without any hurdles.
To prepare your work area, you have to prepare your sink for the new seal, and for that, you have to jump up to the next step.
Step 2. Cutting away old Seal
Use a knife to cut away the old seal around the edges of the kitchen sink.
And make sure not to leave any seal behind; otherwise, the new seal will not stick properly with the surface while reapplying.
Step 3: Swabbing away the old Seal
Use aldehyde alcohol to swab away the seal you have just removed, and use a dry cloth to dry the surface so that you can start working properly.
Step 4: Mark the edges
Use painter’s tape and apply it around the edges of the countertop and around the kitchen sink as well to create a proper straight line.
Step 5: Start applying sealant
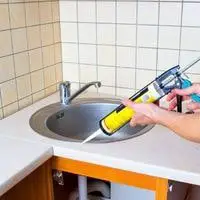
Start applying sealant around the edges with the help of the sealant tube and if you don’t have the sealant tube, then use a sealant tube that is squeezable so you can squeeze it and apply it.
Apply it to the marked area that you marked earlier using painter’s tape. make sure that you apply silicon consistently and don’t break its line.
If due for any reason, you have to break the line, then start applying it a bit before the point from where you started.
Ensure that you are done applying sealant all around the kitchen sink edges.
Step 6: Almost there
After applying sealant, now is time to wear your rubber gloves so that you can keep yourself out of the mess and start rubbing your fingers all around the drips.
Step 7: Remove the Painter’s Tape
Don’t forget to remove the painter’s tape right after applying the sealant because if the sealant gets dry, then it is going to be a hurdle to remove it that way.
It is the most important step because if you do not remove it, then it will get dry, and guess what? you have to reverse the process, and this feels like a nightmare even thinking about it.
Step 8: You’re Done
You’re finally done, all you have to do is to wait for about 60 minutes or extended time up to 34 hours as it depends on the weather around you. Kitchen sink leaking around edges.
Related Guides