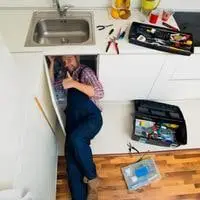
How to remove a kitchen sink that is glued down. Kitchen sinks are the most important and most useful part of the kitchen. But sometimes, you get tired of using an old-fashioned kitchen sink, and you want an upgrade.
To replace the kitchen sink, you need to remove a sink, but what if your sink is glued down and if you don’t know how to remove it, then it’s surely going to be a hurdle? Hey, we are here to the rescue.
To remove your kitchen sink that is glued down, you have to gather some tools and some plumbing supplies.
How to remove a kitchen sink that is glued down
After collecting all the required tools and equipment now, you are ready to start the process.
If you follow the steps, then you will be able to smoothly remove the glued sink.
Things You’ll Need
First of all, you have to arrange all these supplies and tools to start removing procedures smoothly and arrange them all at once without wasting extra time arranging tools one by one.
- Hammer
- Pipe wrench
- modifiable wrenches
- Screwdriver
- Bucket
- Professional plumbing gloves
- knife
- Piece of cloth
- Hairdryer
- Heat gun
- Blow dryer
Prepare your kitchen To remove the Glued sink
Prepare your kitchen to remove the glued sink by Turning off the electricity as it is a safe practice to prevent yourself from any current shock.
- Turn off the water supply to stop your kitchen from water flood, which will make your work double.
- Turn off the gas supply as a precautionary measure because while removing the process, gas leakage is expected.
- Disconnect lightning spouts from your kitchen
- Release kitchen fittings and plumbing fixtures to make your work easier.
- Remove all heavy devices and disjoin the fixing valves and all the knobs.
1. Secure your Floor
As removing the sink is going to be a messier part so secure your floor by putting cloth under the sink so that you can save your sink from getting damaged and scratched if screws fall down the sink, then a piece of soft towel can catch them, and you can use them when needed.
2. Unplug Garbage Disposals and Dishwares
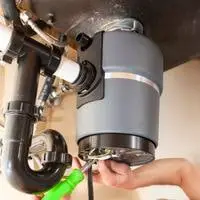
If your sink has a garbage disposal, then it is going to be the first part that you have to remove. Use an adjustable wrench to remove disposal garbage.
They are very big, and removing them will give you access to all the pipes that are hidden behind garbage disposal.
3. Disconnect The Drain Line
Now After successfully removing garbage disposals now, use an adjustable wrench again to turn off the drain lines.
4. Draining extra water
Place a bucket underneath so that during the removal process of the sink, you can catch the spilling water stored in the sink’s pipelines by simply putting the bucket down the sink.
5. Detach The Drain Pipe
By placing a bucket under the sink now, you can use your hands to loosen the screws but if the screws are stubborn, then use an adjustable wrench to loosen them. And detach the p-trap.
While detaching process makes sure to keep all the parts together so that you can’t lose any of them.
Even if you are replacing your sink, you might still need some old parts while placing the new sink.
6. Disconnect The Faucet

After detaching the drain pipes Now, it’s time to remove the faucet.
For this, shut off the main valves. Now drop the faucet a little to relieve all the pressure so that it can make your process smooth.
Now loosen the nuts and screws that are attached done the faucet.
After doing all the necessary steps, now remove the main tubes; you are done removing the faucet but make sure to put a cloth under the sink to prevent your faucet from getting scratched or damaged as if you skipped this step earlier.
7. Remove the Clippers
To remove the sink properly and completely, you have to remove the clippers. Many sinks are attached using these clips, and they are holding your sink.
Use your hand to loosen them, and again if they are stubborn, then use an adjustable wrench to remove them. If your sink is attached using any kind of liquid nails, then you have to use have to do this process more forcefully.
8. Pulling out Liquid Nails
To pull out liquid nails, you have to soften the structure on which the glue is sticking or use some heating stuff like hair or a blow dryer to soften it.
Then use a knife or something sharp enough to scrap the adhesive glue. Now wipe out the exterior surface.
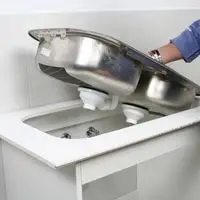
9. Remove the sink
Now after doing all the above steps completely and efficiently, and if you are done removing liquid adhesive nails, then it’s time to remove the sink.
Pull out the sink by simply pulling it up but make sure to hold it tightly so that it can’t get damaged.
10. Cleaning It up
Now, after successfully removing the sink now, you have to clean up almost everything and make your counter ready to welcome a new sink.
Use a harsh efficiency of detergent that can even wipe out leftover glue and heavy sort of dirt because removing the whole sink is a very messier process.
If you follow the tips and tricks that are discussed above, then you can go organized with the process.
Final Verdict
How to remove a kitchen sink that is glued down. This is the simple process of removing a sink that is glued down, and by following all the steps and if you have the right tools and equipment, then you will be able to remove the glued kitchen sink while saving a lot of time.
Related Guides