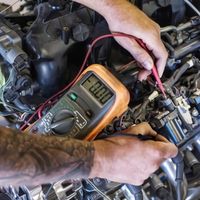
How to test small engine ignition coil with multimeter. Multimeters usually check the resistance which ensures there are no short or open circuits within the ignition coil.
If you are facing any difficulty performing the multimeter test for the ignition coil, follow the simple method to get the desired results.
You need to test the ignition coil keeping the following factors into consideration.
- Vehicle Model
- Current engine
- Surrounding conditions.
Don’t get confused!
We have brought all the possible detailed procedures to test the ignition coil for perfect results.
Let’s start trying it out!
How to test small engine ignition Coil with Multimeter 

All you need is a bag of recommended tools and a multimeter device to check the coil at home.
Prerequisites
User manual
The specifications lie in the user manual. The specifications help you interpret the results shown by the multimeter.
Essential Tools
- A test light
- Spark plug
- Heat gun machine
- Wrench
- Socket sets
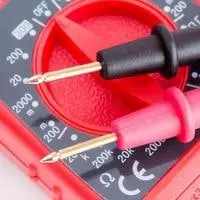
- Multimeter Device
Testing the Coil’s Primary Resistance
Procedure:
- Each ignition coil has its specifications.
- Check that, and let’s get started.
- Maintain the temperature at 20 degrees centigrade or 68 degrees Fahrenheit
- Take out the ignition coil by unplugging the high voltage connectors.
- Once removed, check it physically for any corrosion or damage.
- Clean it in case of any dirt or dust present.
- All the particulars can prevent the coil from generating the voltage required for testing.
- Take the multimeter and set it to auto
- range mode.
- Now place the leads of the multimeter on the primary terminals at the top of the coil connecting one to a positive and the other to a negative terminal.
- When you connect the leads with both terminals, the multimeter will show the resistance in ohms. Note down the value.
- The next step is to compare the multimeter reading with specifications.
- If the resistance is 0.9 ohms, the coil is working well.
- The resistance value for the primary coil ranges from 0.3- 1 ohm.
- If the resistance value exceeds specification or decreases, consider the following assumptions.
- If the value is below the specifications, let’s say 0.1 ohms, it indicates the short-circuiting of primary winding in the ignition coil.
- If the value exceeds the specifications, let’s say 2 ohms, the coil needs to be changed.
- If the results show an infinite value, there might be an electrical opening,
- Change the coil in all circumstances if the value is not in the range of 0.3-1 ohm.
Testing the Coil’s Secondary Resistance
Procedure
- Take the ignition coil and clean it.
- Set the multimeter to 20K ohms.
- Now place one of the leads on the secondary and the other on the BAT terminal.
- Note down the value of resistance.
- The next step is to compare the reading of the multimeter with specifications.
- If the resistance is 8000 ohms, the coil is working well.
- Because the typical resistance value in terms of specifications for the secondary coil ranges from
- 6000 to 12000 ohms.
- Remember to read the guidelines in the repair for locating the terminals correctly.
- If the resistance value is increased or decreased, consider the following assumptions.
- If the value is below the specifications, let’s say 4000 ohms, it indicates the short-circuiting of primary winding in the ignition coil.
- If the value exceeds the specifications, let’s say 15000 ohms, it indicates too much resistance in the windings, and the coil needs to be changed.
- If the results show an infinite value, there might be an electrical opening,
- Change the coil in all circumstances if the value is not in the range of 6000 to 12000 ohms.
Conclusion
To test the ignition coil, you need a multimeter and manual for resistance specifications. After connecting the leads, the multimeter provides the resistance value. To check the resistance value, compare it with the specification to conclude the final results.
Related Guides