
How to check a 12 volt battery with a multimeter. Multimeter aids a lot in performing various kinds of battery tests in three different ways. All of the following methods include the usage of a multimeter.
- Unvarying or static battery voltage test.
- Endurance or load testing.
- Testing by charging the system is commonly named a charging system test.
- Performing static battery voltage test using a multimeter
Getting to know the state of charges present in the battery is quite important. A static battery voltage test helps us determine whether a battery needs a little boost in charge to retain its full energy if it is out of form.
Ensure that you have not charged your battery before carrying the test because charges must be unvarying inside the battery. 1.5 hours before conducting a new test is considered an accurate period to ensure accuracy.
How to check a 12 volt battery with a multimeter
After ensuring the said things, follow the steps below one after one.
- Adjust the multimeter concerning 20 volts of direct current.
- Connect the multimeter leads with battery terminals so that positive leads for the positive terminal and negative leads for the negative terminal.
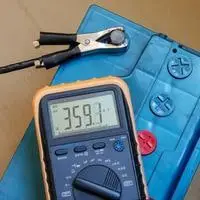
Having done the said things, the multimeter will show some readings. If the meter reads the voltage below 12 volts, it alarms you to charge the battery.
If it conveys that the reading exceeds 12.5 volts, it states that the battery is fully charged.
If the reading indicates the decrement below 12.5 volts, it shows that the battery has been charged more than half, and you will not get your battery harmed upon further charging.
The battery will be considered empty if the reading decreases to 10 volts.
-
Performing endurance testing
You will not need to disconnect the battery from the vehicle as ignition will be required to perform load testing.
Adjustment of the multimeter will be made in a 20 volts range of direct current. Join the leads with battery terminals as positive to positive and negative to negative.
Now, ignite the engine, but you need not pay heed to if the engine starts or not. To clear the test, the reading should be close to 10 volts for 30 seconds. If the reading indicating on the multimeter is below 9.6 volts, there is some problem with the battery.
It would be problematic if good reading appears on a multimeter for a while and then starts going down undeviatingly. The same results will be for a sudden decrement of the battery to 0 volts.
-
Performing test by charging the system
You can perform the said test to get known to the battery condition in terms of charging.
You have to ensure the same arrangements regarding the multimeter while making its connection to the battery as we have done before.
First of all, adjust the multimeter to 20 volts of direct current.
The battery’s positive terminal should be attached to the positive lead of the multimeter, and the negative lead of the multimeter should be attached to the battery’s negative terminal.
You have to take into your account that the same terminal goes for the same lead and vice versa.
After performing all the steps, push the engine button and make sure that it is 3,000 RPM. The multimeter should show a voltage reading between 13 and 14 volts to ensure a good charging system.
You should match the owner’s manual form regarding the vehicle after attempting each test as it includes the precise information respective of the condition of battery-related to volts.
How to check a 12 volt battery with a multimeter
Related Guides