Replace heating element in oven. The oven is an integral part of a kitchen and is used a lot in daily routine.
But it’ll be a sad situation if the oven heating elements get damaged or burnt.
Whenever you suspect that the items you put in the electric oven are not warm as you usually feel while baking, or maybe not heating enough, then you need to replace the heating element in the oven.
Don’t worry, and take it easy. It is not a difficult task, as you don’t even need to be skilled to replace a new element in your oven.
The only thing that you are required is accurate guidance for the amazing results that we’ll provide.
Replace heating element in oven
Steps of Replacing Heating Element in Oven
Here, we are going to start the process of changing the heating element in your oven.
This task is segmented into different parts.
But the leading segment is removing the old element and placing the new heating element into your oven.
Required Tools Kit
- Screwdriver
- Gloves
- Needle nosed plier
- Multimeter
Diagnose Defective Heating Element
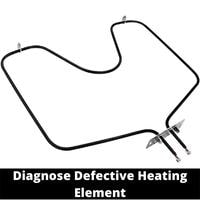
Before doing anything, we want to tell you that some oven models have different numbers of heating elements, but most ovens have two heating elements.
One in the bottom is called the bake element, and the second is the upper element called the broil element.
The bottom baking element is the primary heating element used for baking, located on the oven floor.
While the upper broiling element is used for cooking and toasting the food.
Both heating elements work together when you put something on the oven racks, but you may also change their settings to work them separately.
Elimination of Old Heating Element

In this step, we will remove your oven’s old heating element. Follow each instruction carefully to get prosperous results.
We suggest that you remember the way to remove the heating element. It may help you while installing the new baking element.
Step 1. Disconnect Power
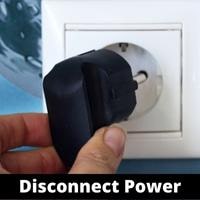
Before trying to start tackling your oven heating element, you need to cut off the power source of your oven as a safety measure.
You may disconnect the oven plug, but if you can’t approach the wall socket, you may turn off the circuit breaker.
Step 2. Let the Oven Cool
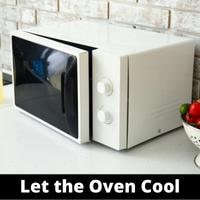
If you recently tried to run your oven, then you have to wait for some time before trying to remove the baked element from your oven.
Because the heating elements are designed to convert the electric power into heat energy.
They are made of metal and could be harmful in case of hot.
To confirm the temperature, you may use a thermometer. After ensuring the average temperature, you may start accessing the heating element.
Replaced oven element still not working
Step 3. Get Off Oven Racks
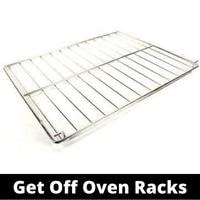
The next step is removing the oven racks to make the work easier. It depends on your oven and how many racks you are required to remove.
So, if you feel that your oven door is making trouble while working inside the oven, you may also remove it by pulling it up to remove it from its hinges.
Step 4. Lift-Up the Mounting Plate

In this step, you need to remove the base panel of your oven.
You need to check the grooved lips on the metal plate covering your oven heating elements.
Pull the panel from the front edge and then lift it.
If your oven doesn’t have grooved lips, you may simply slide it and lift it to remove the base panel.
Step5. Unscrew the Screws & Brackets
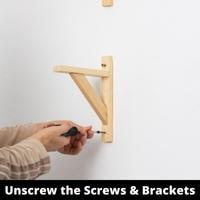
It depends on the model of your oven and how many mounting screws you have on your oven’s heating element.
Most probably, it could be two screws or more than two.
Now, you are required a flat-headed screwdriver to remove the mounting screws.
If your oven has the holding brackets, you must remove them too.
You may check that if they are attached with screws, remove the screws.
Remove them with a nut driver if they are mounted with clamps.
You have to keep all the materials in a safe place as you need to use them again for mounting.
Step 6. Remove Wire Harness / Connector Clips
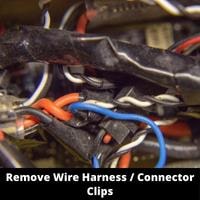
After removing the screws and brackets, you need to remove the oven wires harness to disconnect the heating element from your oven.
To make it easy, you need to pull the heating element a little towards you to make space for working.
Then take the needle nose pliers and detach the wire connector clips from their terminals.
Secure them with the help of a clip or tape because if they fall in the electric oven housing, you need to get them off after opening the back cabinet of your oven.
Electric oven shuts off while baking
Step 7. Eliminate the Old Element
After removing the mounting plate, screws, brackets, and connector clips, now the old defective element is ready to remove from its spot.
Installation of New Heating Element
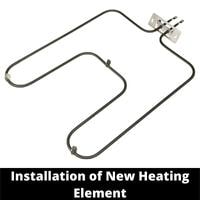
Now, we are starting the process of installing the new oven element.
While buying a new heating element, ensure that you are buying the element suitable to your oven brand, model number, and serial code.
Stay calm, and follow each step carefully to avoid failure and get excellent results from the replacement element without wasting your precious time.
Step 1. Locate the New Element
So, first, you need to install the new heating element at its correct position: the bottom surface.
Don’t forget to align it. As you already know where your oven element will fit because you have seen it while removing it.
So, please don’t put it too far from the wires as they need to be connected, line up the new element holes so that you may locate it at the exact position without making any fault.
Step 2. Attach Connector Clips
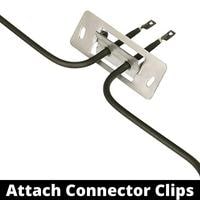
So, in the second step, you will work with the wires.
You have disconnected your oven’s power source, so feel free while do your job.
Now, you need to attach your oven heating element from the back side with the wire harness.
You may use the needle-nose pliers to attach the connector clips to the element terminals at the back of the heating element.
A sound of a click is a sign of fully connected clips. So, pay attention to this sound while attaching the clips to the terminals to prevent any loose connection.
Step 3. Tighten the Screws & Brackets
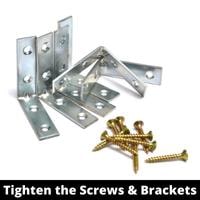
Now, you require a screwdriver to tighten the screws and place the mounting screws in the holes to ensure that the connection is secured and the element is not shivering.
If you have brackets mounted on your oven with screws or clamps, secure them by using the screwdriver or nut driver.
Step 4. Attach the Mounting Plate
Now, attach the mounting plate back to its spot. If your oven has grooved lips, you may fix it with a little slide.
And if it is secured with a screw, then fix them too.
Step 5. Insert the Oven Racks

Now insert the oven racks into their place after cleaning them.
And if you have fully removed the oven door before, place it back by inserting it into the oven door hinges.
Step 6. Connect the Power
Now you may plug the power cable into the wall socket and turn it ON.
But if you have switched OFF the circuit breaker, you must turn it ON.
After connecting the power source to your oven, you have to test whether your oven starts working or not.
If it starts working, then it’ll be a happy thing. If not, you have to check the power issues of your oven.
Conclusion
We hope these instructions enable you to successfully replace your oven’s heating element. You have to be focused on accomplishing your task of replacing the oven element.
If you are not confident, we suggest you do not develop more complexities for yourself. You may also contact a professional of an electric oven.