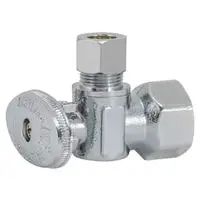
Quarter turn shut off valve leaking. If this problem is created, you don’t need to panic because it can be fixed in no time. On most occasions, the quarter-turn valve starts dripping water due to the worn-out packing nut, which almost covers the faucet stem.
The packing around the valve or faucet diminishes with time, and when it gets too old, the water starts leaking out of it because it is not more serviceable. You will have to replace it. Otherwise, it will continuously start leaking water.
Another reason behind the 1/4 turn shut valve leaking is that the body of the metal valve is threaded to tighten to prevent the leakage of water.
When you detach the fittings, then it becomes loosened, due to which it starts leaking. The best choice is to replace the valve either by yourself, or you can hire a plumber to save the water.
Quarter turn shut off valve leaking
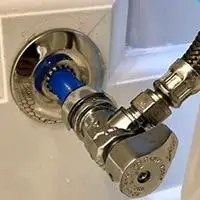
Shutt off valves, as their name, is installed in the pipes to open and close the water supply. Sinks, toilets, and washers have their own shut-off valves.
The quarter-turn faucets or valves are advanced valves because they have ball configuration in them, and the water starts flowing from them even when they are quarter open.
Things went worst if any of the valves started leaking because the water in gallons was wasted the whole day, and also it affected the billed water.
Here are some of the causes and other remedies behind the leaking water from the 1/4 turn valve.
Shut off the water supply
If your quarter-turn valve is leaking continuously, then the first work to do is to shut off the water supply from the main valve because you can not open and tighten the defective valve as the water keeps dripping and will disturb you to fix the issue.
Tighten the packing nut
Mostly the reason behind the culprit of the defective valve is packing nut around the faucet stem is either loose or worn out with the age. Don’t need to worry about this problem.
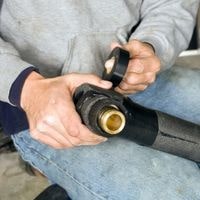
Just take two wrenches and clutch the valve body with the help of one wrench, and rotate the packing of the nut clockwise with the help of another wrench.
If the water is dripping due to this, then after tightening the nut, the water will stop leaking from the quarter-turn valve.
The packing nut is missing
Sometimes due to the rough use of the valve, the packing nut inside the valve stem drops and disappears.
If you open the nut packing, and there you see no nut in it then you are in trouble because it is the reason behind the twenty-four-hour leak of water.
Its solution is that go near a hardware store and bring a new nut for the valve and tighten it properly.
Wrap the valve with tape
If you are facing the problem of dripping water from the valve, then a simple solution is to close the supply of water from the main valve and then wrap the faucet stem with tape; the water will stop leaking from it.
Washer not set properly
The quarter-turn valve starts leaking sometime due to not setting off a washer inside it.
At times it happens that when you open the valve and then on closing the washer inside, the clave stem does not seat accurately, due to which water is dripping.
Open the valve with the help of a wrench and the seat of the washer in its original position so that the valve is shut off properly.
The o ring is expanded
If you will open and close the quarter inlet valve irregularly, then there is a chance of swelling up of the o-ring. So be careful while opening and closing the faucet. Always turn it slowly so that it does not swell up.
If you will use it roughly by moving it up and down its o- ring will swell up and also the packing nut will not remain tightened.
Conclusion
The bottom line of the discussion is that if your quarter-turn shut-off faucet leaking then don’t take it easy because gallons of water will be wasting a whole day.
Mostly this issue occurs due to the loosened packing nut around the valve stem, which can be tightened with the help of wrenches. One more thing to care about is opening and closing the valve carefully.
Related Guides