Outdoor faucet won t turn off. Outside faucets are as important functional as inside faucets are useful. Both operate in similar ways to provide a good water flow.
Outside faucets are so useful to the extent that they will make your car washing process easier, or every time before watering plants, you don’t have to think about setting up pipes. If you have an outside faucet, then it will make your life a lot easier.
But sometimes faucets stop working for many possible reasons. Like indoor faucets, outdoor faucets also sometimes start disturbing the water flow and won’t turn off properly, and now water is flooding everywhere.
There could be a lot of reasons for the worn-out faucets. But the most common reasons are
Outdoor faucet won t turn off
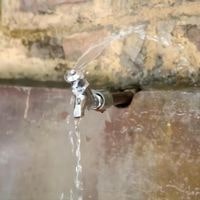
The main and most common reason for the dysfunction of the outside faucet is the weather; sometimes cold climate and rust on the parts of the faucet lead to the water leakage and the faucet being stuck halfway turning off.
Now you are in a frantic way trying to turn the faucet off fully, but all in vain. Now you are thinking of calling the plumber for the maintenance; well, stop!
You can do it to yourself quite easily if you have the right type of tools and with the help of the instructions that you are going to read in this article. But first, note down the basic tools.
Tools you will Need
Pliers
Two adaptable wrenches
Skewering oil
Grease
Screwdriver
after managing all the necessary tools now, let’s start the process.
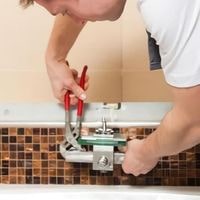
Repair an outdoor faucet that won’t turn off
You don’t need an expensive plumber to set up your worn-out faucet.
You can surely accomplish this task by utilizing your skills using a few tools that you will get after digging into your toolbox.
After gathering tools, follow up on these steps.
Step-1: Turning off the Faucets Water supply
Before fixing anything, make sure to turn off the faucet’s water supply by turning off the main valves that supply water.
Many house owners prefer to locate valves in the basements or garages. Sometimes there could be more than one water valve that you have to close to prevent excessive water flow.
After locating the Shutoff valve, now turn the valve in a clockwise direction to close it and tighten it until you feel that it can’t be tightened anymore.
Step-2: Draining the water from Faucet
Shutting down the valves means that there is no water supply to the faucet, but there is still water left in the pipes and the faucet as well, and removing that excessive water will keep your faucet in a functional form. It reduces the chance of blasting reaction of water.
You can drain the water from the faucet by turning the faucet’s handle or knob. Now, wait for the remaining water to drain. This step will help you to get rid of the remaining water securely.
Step-3: Release the filling nut
To release the filling nut, use an adaptable wrench. Wrap the wrench around nuts and turn them in an antilock-wise direction to loosen the valve assembly but keep another adjustable wrench to tighten the faucet so that it doesn’t move around while you are releasing the filling nuts.
Then remove the whole valve assembly using your hands, and then remove the faucet handle by turning it in an anti-clockwise direction.
But if this process is not working for you and nuts are not coming out with the help of an adjustable wrench, then it means that nuts are so tightly stubborn.
So to release those stubborn nuts, you have to grease the nuts and wait for a few minutes to let the grease show its magic, and then again release them using an adjustable wrench.
Step-4: Release the valve stem
You need pliers and an adjustable wrench to release the valve stem .releasing the valve stem will help you to look a bit closer to a problem.
During this step, use pair of pliers to hold the pipe tightly, and then use a flathead screwdriver to remove the washer and O-ring from the valve stem.
Then check the washer and O-ring that if they are working their job or not.
Step-5: Reassemble the faucet with new parts where necessary
Now, after accomplishing all the steps now, it’s time to reassemble the parts that are causing the problem, or if the parts are rusted, if you feel that they need a replacement, then following these final steps can help you to reassemble the faucet with a new part.
It’s time to reinstall the valve assembly that we released earlier.
Use an adjustable wrench to tighten the valve assembly as tightly as you can.
Now it’s time to turn back on the water supply that we turned off earlier by turning the water supply valve on.
Now it’s time to open the faucet to check if the water is flowing properly or not and make sure that the faucet is turning off properly.
How to Fix a Leaky Outdoor Faucet
Related Guides