
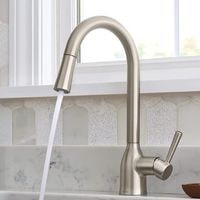
Moen single-handle kitchen faucet troubleshooting repair guide. These faucets are known as they use only one handle to control water flow and as well as they control temperature. Sometimes Moen’s single-handed kitchen faucets can get faulty as well.
If something gets wrong with the Moen single handle kitchen faucet and you want to troubleshoot the problem but you don’t know how can you start and you are stuck at some point then don’t worry, you are in the right place because most of the times you think that you can repair something without taking help and that leads you to the wastage of time, but you are wise enough to drop yourself at this Article.
In this article, we are going to tell you if something goes wrong with your Moen single-handle kitchen faucet then, how you can troubleshoot the problem. Not only troubleshooting, but you will also get a proper repair guide.
Moen single handle kitchen faucet troubleshooting repair guide
Parts
Before getting into the troubleshooting process, if you will understand the parts of the Moen Faucet handle, then you will find it easier to identify the problem and then find the solution, so here are some brief information about the parts of the Moen faucet.
Handle Parts
- Cover
- Screw
- Connector
- Thrust Washer
- Handle
Down the handle Parts
- Collar
- Pivot Retainer
- Retainer Nut
- Thrust Washer
- Spout
- Diverter
Cartridge Parts
- Cartridge
- Cartridge clips
Identifying the problem
There could be many possible reasons that hurdle the Moen single handle Faucet, but almost 90% of the problems lie in the Cartridge of the Moen single handle kitchen faucet, and replacing the cartridge and o-ring will do the job.
So here are some steps that you can follow to repair your Moen single-handle kitchen faucet.
Elements of The Faucet
To change the cartridge or O-ring, you have to fully examine the parts of the faucet. After examining the parts of the faucet, you have to reassemble it.
And if you are acquainted with the faucet parts after checking up on the above details of the parts, then it will help you to examine and disassemble the faucet parts.
The faucet has different small parts that function the faucet properly.
Parts of Cartridge
- Clip
- Cartridge Stem
- Spout Seal (valve body)
- Spout Body
- Spout Seal at the end of Cartridge
- Ear
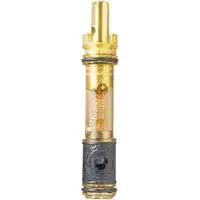
The purpose of the cartridge is to control the water flow. The cartridge is hidden down the faucet, and you can locate it underneath the handle of the faucet.
The cartridge is a kind of very crucial part of the Moen single-handle faucet. The cartridge prevents the water flow from getting leaked, and its ending spout seals the ends, which don’t allow water to flow down the cartridge if you witness the problem of leakage, then it is because of the damaged cartridge.
Cartridge Assembly
The cartridge assembly generally consists of two parts.
- Spout Body
- The valve body
The valve body operates as the seal and you can locate it beyond the spout body. And the spout body is located below the valve body.
Things You’ll Need
- Flathead Screwdriver
- Pair of pliers
- Allen wrench
- Parts that you want to replace
- Blading Tool
- Moen Twister and Puller
- Parts for replacement
- Soft Towel
Step-1) Cover the drain
Cover drain by using a soft towel so that while reassembling the cartridge, nothing can get lost and screws or other parts of the faucet drops down onto the towel and you can use them at the time of reassembling the faucet.
Step-2) Pook off the Moen Faucet’s Handle
Use a screwdriver to remove the screws, and then after removing the screws, lift the handle upside to remove it before that, you have to use a flat blade to remove the handle cover but make sure to do this step carefully t prevent your cartridge cap from getting damaged.
Step-3) Pock off the cartridge clip
After pulling off the handle now it’s time to pock off the cartridge clip by unscrewing nuts and other parts that are with them like the washer and remove them after unscrewing.
Then use a screwdriver to pock off the cartridges.
Step-4) Removing cartridge from the faucet body
Now you can use Moen’s tools to remove the cartilage from its body. Moen has tools that help to remove Moen cartridges. Using these specific tools, twitch the carriage a few times to simply loosen it.
When the cartridge is loosened perfectly, than with the help of pair of pliers remove the cartridge from the faucet body.
Step-5) Replacement of parts
After removing all parts of the faucet, now it is going to be easy for you to identify which part is faulty and needs replacement, and after checking up on all the parts and successfully replacing that faulty part with the new one then, you can simply put all the parts back to its positions.
You have to simply reverse the process, and you can put all the things back in their place. Moen single handle kitchen faucet troubleshooting repair guide.
Related Guides