How to fix a crack in a plastic bathtub. Nowadays, the bathtub has become a part of our bathrooms, and whenever we feel tired, taking a bath gives us good comfort.
A bath in the bathtub makes our rough and lazy time fresh and active.
Well, it must be frustrating to see our peaceful place with cracks. But it is not only you who is facing the bathtub cracks. It is a common problem that happens commonly.
If you have a plastic bathtub or fiberglass tub that gets cracked or cracks, it doesn’t mean throwing it and replacing it with a new one.
You can save your money by repairing it instead of replacing it. In this article, we will explain to you how to fix a crack in a plastic bathtub.
Let’s start the procedure by gaining knowledge of the types of cracks, required materials, reasons, and fixing procedures.
How to fix a crack in a plastic bathtub
Guide To Fix A Crack In A Bathtub
Now, it’s time to do the task of fixing your plastic tub.
Before starting, we want to tell you; you can find the type of your bathtub crack, the reasons, the required apparatus, and the accurate steps to fix the cracked area.
Types of bathtub Cracks
We will discuss the types of bathtub cracks that may help you determine your ones.
- Bathtub Hairline cracks
The first type is hairline crack that may smash the wholeness or unity of your bathtub. It would be better to repair them before they become a big loss.
-
Bathtub Stress Cracks
Stress cracks occur when heavy objects interact with the surface. But it remains on the outer surface and doesn’t damage the inside material of the tub.
These cracks are easy to fix using the repair kit. Let’s walk to the next portion to see what is there to help you fix your bathtub.
Reasons For Crack in a Plastic Tub
If your bathtub has a crack, there might be some reasons. A small crack often appears on the plastic surface, which may start growing with time.
With time, dampness gets into the plastic tub’s inner material, and the loses its durability.
We have made a list of the reasons that will give an idea that how you can save your bathtub from future cracks.
-
Fall Over The Heavy Items
Plastic bathtubs get cracks when you accidentally drop any heavy objects on the surface of the plastic tub because the heavy items create marks on the surface that turns into cracks afterward.
-
Insufficiency of Props
Plastic bathtub shape or structure matters a lot in crack situations. Plastic tubs have a shape with a lack of props, so there are high chances of cracks on the tub.
-
Using Harsh Cleaner
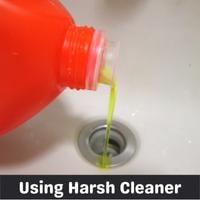
If you use abrasive cleaners, including bleach, in your plastic tub, then you don’t expect that you can save your bathtub from cracks.
The chemical reaction can easily cause abrasion on your bathtub surface. These harsh cleaners may cause get off the glassy coating.
Required Repair kit
The things you are required in your repair kit to fix the hairline crack of your bathtubs are mentioned below.
- A Power drill
- A Putty knife
- A Nylon bristled paintbrush
- Drill bit
- An Epoxy resin
- Dust cloth or rag
- A Hairdryer (optional)
- 120 and 240 Grit sandpapers
Steps To Fix Plastic Cracked Bathtub
So, fixing the hairline cracks in the plastic bathtub is not much more challenging. Please start repairing when the small cracks appear.
Otherwise, it turns bigger and could badly affect the inner material. You have to pay attention while going through the repair process given below.
Step 1: Clean The Bathtub

Firstly, clean with hot soapy water instead of harsh or abrasive cleaner. Ensure to clean the defective area well.
It will help you using the patch materials if the crack has no clog, dirt, or build-up.
Step 2: Mark & Drill The Hairline Cracks
The next thing that you need to do is inspect the hairline crack or cracks in your bathtub. You may mark them to get better identification while doing the fixing process.
Now, grab your drill machine and makes the 1/4 inch holes on the left and right sides of the bathtubs.
It helps prevent the cracks from getting widen. Ensure to make holes on each side of each crack.
Step 3: Sand with Sandpaper

Now take the 120 grit sandpaper from your repair kit and sand the bordering area of the hairline crack of the tub.
Please don’t be harsh while sanding the cracks, as we want you to damage your tube.
A sanded area will help you get patched with the filler material better and more effectively.
Step 4: Clean the Sanded Area
Before going to the filling step, clean the sanded area using a water-soaked rag. Ensure that there are no sand particles on the surface.
It would help if you waited for the wet surface to get dry. So leave it for some time, or you may use a dryer if you are in a hurry for a quick dry.
Step 5: Fill Cracks With Filler material
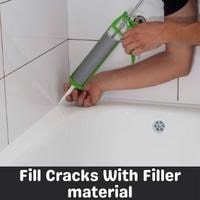
Well, there are many patch materials available for filling the crack. But, we suggest using epoxy resin as it is more efficient and gives durability.
Read the epoxy resin packing description and start filling the hairline crack.
Ensure that you have filled the crack and the holes you have made with a power drill. Don’t use the epoxy resin on a wet surface.
- Use a Putty Knife
If you feel the resin is not even to the tub surface when you are done applying the patch material.
You can use a putty knife to maintain the level of the resin on the surface by eliminating the excess resin.
Let dry the patch materials for almost a whole day and night to get a proper dry. You may use fiberglass filler to fill the hairline crack.
After leaving it for 24 hours, proceed to the next step.
Step 6: 240 Grit SandPaper
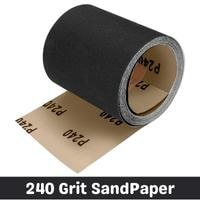
In the following step, you require 240 sandpaper. Inspect the resin whether it is dry entirely or not. Then it would be best if you sanded the resing to get a leveled.
Just filling the crack is not the final step because applying the resin is not enough because it doesn’t make a smooth or plane surface.
So, to prevent any harm, you must take action to make the resin plane. Don’t forget to be gentle while doing the job.
Step 7: Use a Damp Rag/ Soaked Towel
Use a water-soaked rag and use it for clean the cured area surrounding. You must do the job carefully and have to give a better final look to your plastic tub. You have to wait till it gets dried again.
Step 8: Apply Gel Coat Enamel Thin Layer
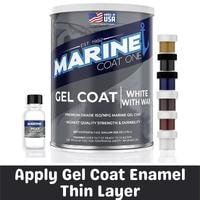
At the end of the fixing process, you have to do the last thing: apply a layer of gel coat enamel. You may also use a sealer.
This material helps secure your plastic bathtubs from dripping moisture and gives a gleaming finish to your bathtub surface.
Tips & Tricks For Bathtub Maintenance
If you want to avoid damage by the cracks or dents on your bathtub, then you must follow some tips to keep your bathtub secure from any physical damage.
Use Non-Toxic Cleaners
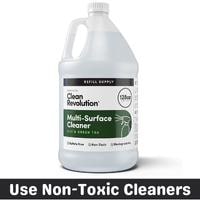
The first piece of essential advice is to say no to abrasive, harsh, or heavy cleaners for cleaning.
These chemicals containing cleaner are highly damaging to the bathtub porcelain.
Instead of that, you may use vinegar, baking soda, or warm water to clean.
Don’t Place Heavy Objects Closer
We know that a well decorative place gives spectacular vibes, but this can be a reason for your bathtub sentence of death.
You can arrange the gadgets or accessories according to your choice, but keeping away any heavy objects to prevent them from falling into your tub would be better.
Regular Cleaning
Keep your bathtubs safe from any build-up, and it would be better to clean your bathtub twice a week.
It may also protect the surface from stains and keep it glossy for a long time.
Use A Proper Support
The thing that you have to be concerned about is that your bathtub must have proper support to prevent any flexibility.
A highly flexible surface has a more high chance of getting cracks.
Conclusion
We highly recommend following the instructions if you are looking for an answer on how to fix a crack in a plastic bathtub.
We have tried our best to resolve your issue. So, a tub cracked from anywhere can get fixed if you have proper guidelines.