
High voltage diode microwave test. Testing the diode requires the power of the diode to be off. If there is a diode problem in your microwave, the transformer will produce a humming sound. You can test the diode with a multimeter and see if the diode is faulty.
I heard a humming sound from the transformer of my oven and checked why the oven’s transformer was producing a humming sound.
The humming sound in my transformer was actually not because of the transformer fault, but I learned that the diode of my oven has some fault.
The diode fault was on google, but I being skeptical, thought I should check the diode of my oven by myself. Testing high-voltage diodes was not as difficult as I thought. I checked different ways to check the diode of my oven. I tested my diode easily.
High Voltage Diode Microwave Test
The microwave is something you don’t want to get faulty. But there can come a humming sound from your microwave’s transformer.
The transformer noise is not actually caused by the transformer itself, but the humming problem is because of a diode. The diode can be tested to know if it’s faulty.
The way to check a diode is like a battery. You need a meter to check the diode and test it.
Touch the positive probe f your meter on the diode’s anode and the opposite probe of the meter with the diode’s cathode. You will be able to test it that way easily.
Reason for testing
The reason you should test a diode is to know if the diode is actually what caused the problem in your oven or if it was any other component.
Testing a diode helps you know other faults and the components that are misbehaving in the oven.
The main reason for testing the diode is safety. The diodes should be tested to know if they are faulty or short, as suing faulty or short diodes will make your appliance useless.
The appliance may explode or not work at all with a faulty diode.
Factors indicating faults
Almost all diodes show some pattern or give an indication that they are faulty. The indications for the faulty can be different in didoes and appliances. You may smell the burning of electrical appliances if the diode is faulty.
The electrical burning smell is a big fault sign. The smell shows the diode defects. The diode may have been broken into parts. You may notice cracks on the diode as well.
You may see spots on the diode that indicate faults. The high voltage will produce a sound like humming sound meaning that the diode has faults.
The microwave may not produce any heat when the cooking cycle is working.
You may not hear the humming from the high-voltage transformer, and the heating may be on, but the heat may be insignificant, and that means that the diode is probably open. Check these factors.
Pre-setting
Before you actually start testing the diode, you need to make sure that a few things are done. You do this pre-setting to know if the diode needs replacement.
The first thing with testing a diode requires the microwave to be disconnected from the power.
The transformer and the oven carry a lot of power, and the capacitor possesses a charge too. The capacitor inside the oven is powerful, so discharge the oven’s capacitor.
The capacitor should actually be removed. The capacitor of the oven is a high voltage, so you should e careful while removing it.
The wires to the capacitor are also sensitive, so remove the capacitor’s wire carefully. The ground connection to the capacitor should be left as it is.
Don’t worry about getting the wrong lead as ground. The lead already has an indication that it can be distinguished through an arrow or a dot.
Testing the diode
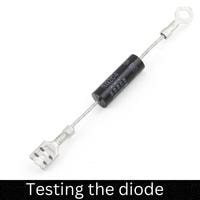
Now that the diode is set to be tested and the ground wires are in their place, and you are safe from the capacitor, you can test the capacitor.
You need an ohmmeter or a multimeter to test the diode. Digital multimeter is more common, so try using the multimeter.
Set the resistance of the meter to 10,000ohm or use a bigger value. You can check the meter and know if it suits the diode or not.
There are two probes on the multimeter, and you know which probe is positive and which is negative.
You can check the probes of the meter by looking at the symbols on the meter and see if which is positive and the other one will be the opposite.
The anode of the diode should be touched with the positive probe of the meter, and the cathode should be touched with the negative probe of the multimeter.
The cathode is near the ground or the wire to the ground, and you know the ground is indicated by something.
The meter will display the diode’s resistance. 50,000 to 200,000 ohms will be displayed if the diode is fine. The resistance may vary on the oven’s model.
Replacement
If there was a fault, then you need a new diode for your oven to work. The diode that suits the oven should be used.
The resistance of the diode should be from the above, and it should not be lower than that. The diode will not give a good result with the wrong resistance.
Get a diode that has the same resistance as your model or the diode that is recommended for your model.
You can check if the diode is suitable online. Take the old diode out and attach the lead to the new diode and check it.
Conclusion
If you have a microwave that is showing problems, then you will need a solution. The best way is to test the diode first before planning further.
You can test the high voltage diode of the microwave through the above steps. Replace the diode or get the diode replaced. Call a professional.
Related Guides