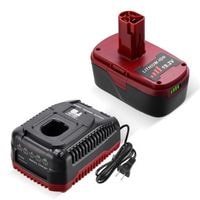
Craftsman 19.2 volt battery charger problems. Craftsman 19.2V drills are known for their fantastic performance and capacity; they are light in weight and allow the user to drill perfectly.
Though it is a very reliable product, even still technical problems do occur, the most common among these problems is the battery charger problems.
This guide will help you identify those problems and help you find Its solution. First, we will try to find the reasons for battery charger failure.
Craftsman 19.2 volt battery charger problems
If you are not using new batteries in your drill, you may come across this issue of drill batteries turning sour.
There can these two problems in the battery charger, an issue in the plug fuse or the battery charger fuse needing to be replaced.
How to diagnose a faulty battery charger?
Before you start the procedure to repair the battery charger, you need to be sure that the problem is with the charger, not the battery itself.
- Using a voltmeter, determine whether the battery charger is producing an electrical current or not. Put the end of the red color wire from the voltmeter on the metal hold on the end of the red wire from the Craftsman battery charger. Connect the end of the black color wire from the voltmeter to the metal clamp on the end of the black wire inside the battery charger.
- Take the voltmeter reading; the charger is charging fine if it shows just over 12V. If there is no change in the reading, the charger will need repairing.
Tools Needed for the Procedure
- Voltmeter,
- Screwdriver,
- Replacement fuse,
- Wirecutter and wire stripper,
- Hot glue gun,
- Soldering iron and paste
- Solder,
- Small wire, and
- Multi-output voltage charger with 20V output
How to repair the battery charger?
To repair the battery charger, we will explain the procedure of replacing the Plug fuse and replacing the charger fuse. You will need to follow the procedural guidelines.
Checking for a loose wire
First, remove the plug from the main socket for plug fuse replacement. Now with a screwdriver, remove the cover of the plug. Check for any loose wire in the plug, as this might be why your charger is not working.
If there is any disconnected wire, lose the station screw and firmly put the wire into the hole. For fuse replacement, first locate the fuse in the charger; there may be a few spare fuses in the charger.
Now remove the fuse from the fuse holder using a screwdriver.
Fuse Replacement
The second step is to remove the fuse from the plug using a screwdriver for plug fuse replacement.
Put a replacement fuse in the fuse plug holder, ensuring that it shows the same ampere reading as the fuse you have removed.
To replace the battery charger fuse, you will put the replacement fuse in the fuse holder, pushing it into place. Now close the fuse cover.
Replacing the cover
Now put back the cover on the plug, tightening it with a screwdriver. To check if it is now working, insert the plug into the socket. Turn on the charge, and repeat the voltmeter test.
If the voltmeter reading is showing just over 12V, you have successfully repaired the battery charger by replacing the fuse plug and the charger fuse.
If there is no reading on the voltmeter after you have replaced and checked the plug fuse and the charger fuse, then the problem may be with the internal wiring of the charger.
In this case, you probably need to get it fixed by the specialist or get a new charger.
Conclusion
Craftsman 19.2-volt battery charger problems. The Craftsman 19.2V battery is considered reliable and genuine. However, you may experience some problems with its charger.
These issues can be fixed by replacing the plug or charger fuse. In case the problem is with the internal wiring of the battery charger, you will need to consult the manufacturing company for expert advice.
Related Guides