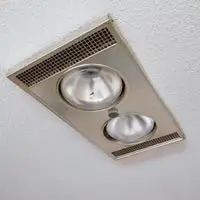
Wiring bathroom fan and light together. The wiring in our house should be done carefully.
The wrong method might result in a safety hazard; the wrong wiring in the house or any other place can cause a lot of damage, and it may even result in the loss of human lives.
The wiring of the house should be done by a professional or someone who has some knowledge about it.
It is not impossible to do your own wiring. It requires understanding and knowledge of managing the wiring and the tools used to do the wiring.
There are certain steps and rules o be followed while doing any type of wiring that I will discuss in the article briefly. The wiring can be done in various ways and methods.
Wiring bathroom fan and light together
To save from the expenses of switches as well as time in finding the switch for the light and the fan, we can actually just wire both the light and the fan together.
This can be done by series or parallel wiring. You just need to connect the wires with each other, red with red and black with black.
Then you just need to connect them to the power button. After giving them power, you can check through the switch.
Procedure for wiring the fan and light together
There are some steps that need to be followed precisely to ensure that the correct and safe type of wiring is done. These steps in the form of points are listed down:
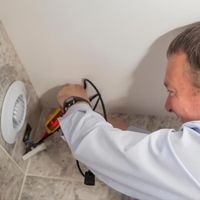
Removing the old board
The first step is to power off the electrical supply and makes sure no power is coming to the board.
Next is to open the power board, which can be done with the help of a screw. You just need to remove the screws that are holding the switch to the wall.
After that, the board will pop up, and you will be able to see wires hanging around and connected to the board. Remove the wires. They are probably also attached to screws.
Just loosen up the screws and remove the wires from the switch. Then put the screws in a safe place, as you will need them again.
Getting another switch
The board you removed would probably have two different switches, one for the board and one for the light. So you need another board with a single switch.
The board will perform the function of turning both the light and the fan ON and OFF. The board will be responsible for both the light and the fan together as you desire them to be.
Identifying the wires
The third step is to do the wiring. Now, this is the actual part of the work. You need to check the wires for the negative point and the positive point.
The color scheme might be different in different countries. So be sure to check it online or use a multimeter to find the negative and positive ends of the wire.
The red one is usually the live one in case of alternating current, while the black one is neutral and ground wire right also present.
Joining the wires
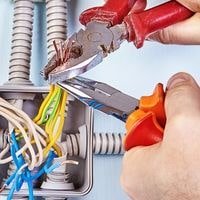
After finding the wire, use a plier to twist the live wires together. After doing the live wires, you need to twist the neutral wires together.
They will become one when you combine them. Don’t use too much force. Otherwise, the wires will break. Make sure you are wiring the correct wires together.
Closing and testing
After combining the two wires, put them in the single switchboard and tighten the screw for the wires to be attached.
Then use the screws you put on the side to screw the board back onto the wall. Check if the board is working or not if the board is working.
If the board is not working, reopen and attach the wires again. This will ensure that the wires work.
Turn the switch on and see if the light and fan are working properly. They will probably work if not, you are doing something wrong.
Conclusion
The working of the fan and light is simple, and their wiring is even more easy to handle.
The table steps are a complete and proper guide for you if you want to wire the switch of light and the fan of the bathroom or any other room together.
Just follow the steps and be careful not to let opposite wires touch each other.
Related Guides