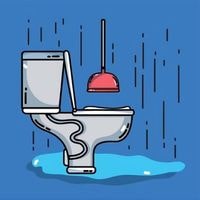
Toilet leaking from tank to bowl. We’re guessing your poor aim isn’t the source of the water pooling surrounding the toilet. Among the most prevalent causes of puddles on the bathroom floor is toilet leaking between the tank and the bowl.
If you notice any leakage down there, now is the time to act. In today’s guide, we’ll go over the procedures you should take to avoid further damage in this case.
We’ll also go over some other probable leak scenarios so you can adequately assess the problem.
Toilet leaking from tank to bowl

The most common cause of a leaking toilet tank is when the seal fails to form a tight fit between the valve seat and the flapper.
This lets water leak and damage the bowl. A faulty seal may be caused by the flapper being out of position. If you notice your water slowly disappearing, then your flush valve could be leaking.
We’d want to walk you through the most common leakage scenarios:
We’ll begin with the most likely source of the leak and the simplest to locate. The colored water will reveal leaks between the tank and the bowl in minutes.
However, there are differing amounts of damage in this situation. If the toilet leaks a lot more when you flush it, it indicates that the bowl gasket has failed.
Furthermore, if water is seeping from the edges and generating an enormous puddle, the bolts and washers are damaged.
Check Shank Gasket
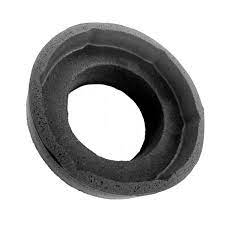
If you realize a few leakages but can’t figure out where it’s arriving from (and it’s not between the tank and the bowl), a leaking shank gasket could be to blame for the puddles in your bathroom.
A ballcock (another name for the shank gasket) allows water to flow freely into the tank.
If you’re not sure where to look for the shank gasket, it’s near where the fill valve is connected to the tank. The shank gasket and the fill valve are linked from the inside of the tank.
The colored water test can also be used here, as the problem is connected to the tank in either case.
Loose Refill tube and cracks
If the spill originates from the back of the tank (typically at the top), the refilling line on the tank has most likely jarred loose. When examining the back of the tank, make sure the flush valves and overflow tubes are working properly.
You can hardly do anything once a crack forms in a porcelain fixture.
Cracks are unpleasant, and if you keep the tank sealed in one location, other cracks may form elsewhere. Installing a new toilet and tank is your only alternative in this situation.
Steps to fix Toilet leaking from tank to bowl
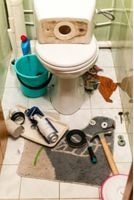
Follow the following steps to solve your problem.
- Turn off the water faucet.
- After 10 to 15 minutes, flush the toilet if you performed our colored-water test. A few colored droplets will fall to the floor of your bathroom. With a towel, wipe off the tank and check that there’s nothing odd (kids leave small watercraft within the tank sometimes).
- After that, you’ll want to detach the intake tube. Unplug it at the toilet, not at the shutdown tension fitting. Unplugging it at the cutoff will simply make it more difficult to re-use the line later.
- Now is the time to check the line. The majority of the bars are chromed and have washers on the top. If this is the situation with your pipe, the washer should be replaced. It’s available in a hardware store. Investing in a supply tube is a wise idea.
- You can finally begin functioning on the fix. Begin by removing the tank from the bowl’s bolts. It may appear challenging to dismantle the following pieces unless you’re attempting it for the first time, but believe us – you will succeed.
- Examine the toilet tank from the inside. Can you find the slotted screw heads? There are two of them, and they run the length of the tank and bowl all the way to the toilet’s finish. In any case, the screws must be removed. Drill the faces out if they’re a bit stiff. Here’s how to go about it.
- Drill at minimum 1/4-inch holes in each screw, pointing toward the center. Begin using smaller drill bits and gradually expand the hole size with larger ones. Drilling can be as simple as one-two-three if you do have sharp bits.
- Raise the toilet tank so that now the heads have been unscrewed. We’ll warn you ahead of time that the scene beneath there is not pleasant (vile stuff mixed with melted rubber – ugh). This mess will have to be peeled off the tank and placed in a plastic shopping bag.
- On the bolt, use metal and a fiber washer. Then, from within, slip it into the tank holes. Furthermore, use a nut to attach the tank. One of the essential aspects is a nut.
- Install the entire tank-to-bowl seal on the bottom of the flapper directly beneath the tank. If you know your water is chemically treated, using some silicone plumber’s lubricant to improve the shield and prolong its life would be ideal.
- It’s now or never! While switching on the water supply again, drop many gallons of water down the tank to inspect for leakage. Congratulations if you can’t find any droplets all around the toilet. It’s just a matter of tightening the inlet valve coupling nut and turning on the water.
- To ensure that everything runs properly, flush the toilet one more.
Conclusion
This may be a helpful guide for you if you observe leaks on your bathroom floor or plan a toilet remodeling project. We wanted to clarify everything about toilet leaks today and walk you through the repair process.
Related Guides