
Many home builders tile their master bathrooms themselves, not just to save money but also to personalize the space. Although tiling is not intricate, it does take time.
When tiling around a tub with a lip, you must place the cement board above it. The tiles will install against the cement board, with the lip visible and a space between the lip and the board.
Tiling around a tub with a lip
With silicone caulk, secure the bottom row of tiles to the tub away from the lip. The lip of the tub should be flush with the wall frame and precisely above the cleat.
Most tubs with lips have a 14-inch gap between the cement board and the tub lip.
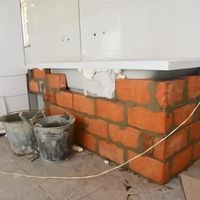
Cement board
For tiling a tub or shower, a cement board makes an excellent base and underlayment. Caulk and other sealants are also necessary for tiling.
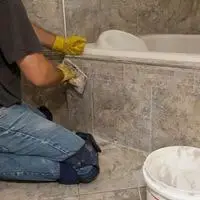
Between the lip and the bottom row of tiles, a layer of caulk is required. The ideal tools for installing tiles are trowels or spreaders. Eye protection is necessary because dirt and dust can enter the air.
You can consider the following contemplations:
- A cement board must be erected unless a backer board is there.
- Measure the length and width of the central tube wall from floor to ceiling.
- The cement board should extend to the ceiling and stop 14 to 12 inches above the tub lip.
- The cement board serves as a wall and a framework for the tiles.
- Cut holes in the cement board where the small bathroom is before installing it.
- Place the cement board on the wall frame and nail it in place so that it is above the lip but without touching it.
- The tub lip should not contact the cement board or backer board, but it should touch the wall frame.
- To connect the cement board to the frame, use backboard screws.
- It’s now time to put the tile mastic on.
- Tile mastic is an adhesive that applies to the backer board’s surface before tiling. Because tile mastic is sticky for 15-25 minutes at least, apply it piece by section.
Tile the tub
Apply the tile to the sticky portion that is currently present. Apply equal pressure to the board and the wall as you place each tile. The tiles will stick if you apply pressure on them.
You’ll need to caulk where the tile meets the tub, where it overlaps the space above the lip. In most tubs with a lip, the very bottom of the tile meets the curvature of the tub lip.
Because the lip does not support the tile, apply a thick coating of silicone caulk. Continue working your way around the tub, reapplying tile mastic in small areas.
When you arrive at the faucet or showerhead locations, you’ll need to trim the tiles to make room for them. You may grout the tiling around the tub once some time has passed.
You should remove the grout between the tiles but any surface-level grout. Wash away any grout that has remained on the tiles with a washcloth and warm water.
Then, apply one additional layer of caulk between the end of the tile and the beginning of the tub.
How to tile a tub surround with large tiles?
When tiling around a tub, be sure to install the backer board and tile at least 12 inches above the pan. Use masking tape where tile meets tub edges as shown in the image below.
First, mark your first layout line at one vertical edge of this first tile against the tub.
Next, snap the rest of the layout lines for that row by moving over on each tape intersection and starting a new line until you reach another wall intersecting the bathtub surround on its other side:
How to tile around an uneven bathtub?
Un-attach your bathtub from the wall, floor, or both. Use a large level to see if it’s level. If not, slide wood shims underneath the tub until you’re happy with its placement at which point use a metal level/ spirit level to check again and make sure the surface is even.
Conclusion
Shortly, for tiling around a tub with a lip, keep cement board or another tile backer clear of the lip region while putting cement board or another tile backer around a tub.
It should be applied to the wall with the bottom edge approximately 1/4 inch above the tub’s lip. Then, on the bottom bathtub tile, apply a sufficient layer of thin-set and put it 1/8 inch above the tub. Use caulk to seal the space between the tile and the tub.
Related Guides