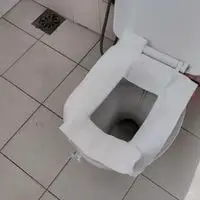
How to put on a toilet seat cover. A toilet seat cover is a sheet of paper or similar material covering the toilet seat.
Some public restrooms include toilet seat cover dispensers so users may get their own. Other toilets include a self-renewing mechanism that replaces the toilet seat cover after each usage.
Before you put on the toilet seat cover
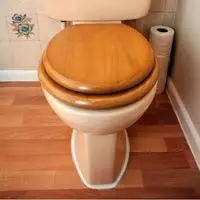
Before purchasing a new toilet seat, take measurements of your present toilet bowl. The majority of toilets have conventional dimensions. Therefore any new seat should fit.
If you would like to be doubly sure, measure the distance between the bolt holes in the toilet bowl with a tape measure. Then, on the replacement seat, double-check the distance between the bolts.
Select the type of seat you like. Toilet seats are available in two primary forms, and a home supply store should provide a variety of brands. The typical variety is spherical, but you can pick an extended one.
How to put on a toilet seat cover

To complete this project, you’ll only need a few straightforward tools. If you already have them, go to the hardware store and pick some up.
Procedure
To put on a toilet seat cover, follow this:
- Remove the old toilet seat and replace it with the new one using the hardware included in the package. The only issue you’ll probably have is if the old bolts are stuck.
- If required, remove the bolt caps. Look near the tank at the edge of the old toilet seat. Plastic caps on each side may be seen where the seat’s hinges join the toilet bowl. If this is the case, carefully pull them off with a flathead screwdriver pushed under their edge.
- Remove the nuts and loosen them.
- Look beneath the edge of the toilet bowl’s sides with your adjustable wrench.
- Bolts should go down through the porcelain and be held in place by nuts.
- On either side of the bowl, one will be placed. Each nut should be tightened using the adjustable wrench.
- To loosen the nuts, turn the wrench counterclockwise.
- Remove the bolts from the old seat. A screwdriver may be slipped into the bolts at the base of the hinges on top of the toilet bowl.
- The seat hinges will be pre-installed. Would you please place them in the same spot as the original seat’s hinges?
- Take a bolt and hold it in your hand. The bolts will be put into holes in the hinges.
- Take one of the nuts in your hand. Take a look at one of the toilet bowl’s sides. The end of one of the bolts should now be visible through the top of the bowl.
- Repeat on the opposite side of the toilet with the other nut.
- Alternately, snap the seat into place. The bolts for certain toilet seat types are not driven through the hinges. Instead of pushing the bolts through the hinges first, you drop them into the holes on either side of the toilet bowl. Then use nuts to secure them in place.
- The bolt heads will be snapped onto or moved over by the seat’s hinges.
Conclusion
In addition, toilet seat coverings made of soft cloth are available. These are mainly used to shield your skin from the cold of a toilet seat.
However, avoid reusing the same cloth seat since it might get moldy and stinky over time.
On the other hand, fabric coverings may be cleaned and reused several times. A new toilet seat is a simple do-it-yourself project.
All you need are some essential tools and a few minutes to replace yours, whether it’s because it’s outdated or because you want a different look.
Related Guides