How to fix a stiff faucet handle. The faucet is the most used part of the home. But over time, they can get stuck, their handles can get stuck, and now you have to put up an extra amount of force to turn them.
If you are facing the same problem where the handle of your faucet is become stiffed and you are not getting to move it, then it is more likely that you have to change the faucet, but if your faucet looks in a good condition, then you just have to repair it.
But at some point, when your faucet starts disturbing your experience, then you think that it’s time to call a plumber, but actually, it is not; you can do it simply by yourself by following a few instructions and by collecting some supplies that you can get by digging into your toolbox.
But before starting a fixing procedure, you have to identify the type of faucet that you are using.
How to fix a stiff faucet handle
Identifying the type
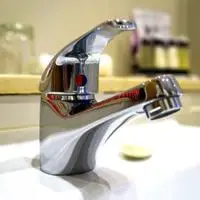
To start fixing your stiff faucet handle, you have to identify the type of faucet, whether your faucet is single-handed or double-handed. The process is going to be pretty much smooth and the same for both types of faucets.
Causes
There could be many possible causes of stiffed faucet handle, but the most common reasons are
- Mineral deposits: mineral deposits are a very common reason for disturbing faucets, whether it is a problem with the aerator or a problem of blockage or stiffness. Mineral deposits come upfront which causes the problem, and dust debris assembles all together and becomes a reason for stiffness.
- Cartridges: Sometimes cartridges can get faulty or worn-out cartridges can cause a problem.
Fixing Process
After identifying the cause, now is time to start fixing the stiff faucet handle, but before that, make sure to collect and arrange a few supplies.
Things You’ll Need
- Bottle of White Vinegar
- Big Bowl
- Plumber’s Grease
- Flathead Screwdriver
- Alen Wrench
- Adjustable wrench
- Pair of Pliers
- Cartridge
- Soft Towel or cloth
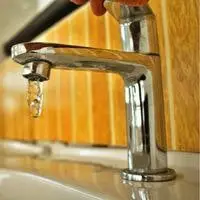
Step-1) Turn off the water supply
The first step that you are going to take to start the fixing process is to turn off the water supply valve. You can locate the turnoff valves beneath the sink, and if you are using bathtubs, then you have to turn off the main water supply valves.
If you are using a sink, then make sure to shut off both valves, the hot water valve, and the cold water valve.
After completely shutting down the main water valve, turn on the faucet to ensure that the water supply is completely blocked so that it cant disturb you in the process.
Step-2) Placing a Towel
After shutting off the water, now it’s time to place a towel or a piece of cloth right under the drain so that while detaching any part parts then possibly you can lose them or you can lose any nuts, so if you put a cloth down the drain, it will catch all the parts and also it will prevent your faucet by getting scratched.
Step-3) Removing the Screws
Now after putting up cloth down the drain now if you want to remove the screws then you have to remove the adorning cap, and when you remove the cap, the screws will be revealed. Use a screwdriver to loose the screws and then remove them.
If screws are stubborn enough to reveal, then use some plumbing grease and let it sit on the nuts for a few minutes until Greece shows its magic. Then tighten screws will get loose and then you can remove them easily.
Step-4) Pulling Out the valve stem
when you will successfully remove the screws, the valve stem will be revealed, and the valve stem is now easy to pull out by simply removing a clip or nut.
Step-5) Cleaning of Faucet and Cartridge
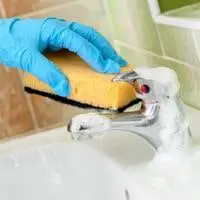
After detaching the faucet, it’s time to clean the faucet’s handle and carriage. To clean them, you’ll need these 2 supplies
- A Bottle of vinegar
- wire Brush cleaner
Now, after collecting wire brush cleaner and a bottle of vinegar, it’s time to check that your faucet is rusted or not.
If your faucet or cartridge has a rusty area and corrosion, then use a wire brush to remove the access rust, and then use a bottle of vinegar to remove the sticky rusty and clean the faucet valve
Once you have removed the cartridge, carefully examine it for corrosion. If you find corroded or rusty areas, try using a wire brush to clean the faucet valve.
White vinegar can also help unstick and remove any rust. If the damage appears to be fairly extensive, it is best to purchase a replacement part.
Clean the cartridge with vinegar and when you are done cleaning it then, start rinsing it with the water.
Final Step
When you are done cleaning your cartridges then it’s time to reverse the process and reassemble everything on the back on the spot.