How to fix a leaky hose bib. If you found a leaky hose bib in your home and don’t know how to fix it, you are at the right place. We have mentioned a handy method that will fix the indoor faucets.
You won’t need a plumber. It will save time and cost. The hose bib consists of an old compression-style design
Let’s grab the tools and fix the leaky hose bibs.
Equipment and Tools
- Channel-lock pliers
- Adjustable wrench
- Screwdriver
Materials
- Hose bib washer assortment
- Graphite packing string
- Bonnet washer
How to fix a leaky hose bib

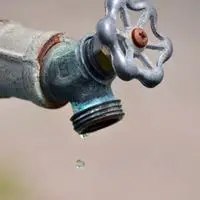
Identifying the issue
- If the problem lies within the compression washer, replace it. A compression washer lies at the end of the inner valve stem. After replacing it, the valve stem gets closed against the valve seat.
- The packing system of the hose bib is wrapped in layers around the valve stem under the packing nut. If the problem lies in the packing string, replace it.
- Very old faucets are more prone to cracks and breaks. These cracks are responsible for leakage.
- There may be damage to the valve seat that requires the installation of a new hose bib.
Let’s fix it.
Cut Off the Water Supply to the Hose Spigot
- Start by cutting off the water supply to the hose bib.
- You can shut it off by a valve that lies inside your house. Locate it and turn the valve handle in the clockwise direction.
- If there is no shut-off valve, cut the whole house water supply for a time.
Unscrewing the Handle
- Take a screwdriver and unscrew the nuts of the handle attached to the steam valve.
- Removing the handle
- Now pull out the handle with a wiggling action.
- Take it out and place the handle and all screws aside.
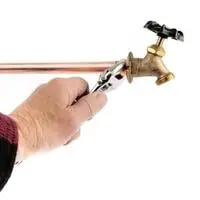
Unscrewing the Packing Nut
- The packing nut secures the valve stem to the hose bib body. The Next task is to unscrew the packing nut with the channel-lock pliers.
- You can also use an adjustable wrench to unscrew the packing nut or bonnet nut.
Unscrewing the Stem
- The next step is to unscrew the stem from the threaded body of the hose bib.
- Turn it in the clockwise direction to unscrew it.
Remove the Valve Stem
After unscrewing the packing nut and valve, remove the valve stem from the hose bib body.
Inspect the Stem Washer
Observe the stem washer for any hardened, cracked, or deformed signs.
If you notice any of the above, the leakage is because of the stem washer.
Replace the Washer
Purchase a new washer and replace it with an old damaged one.
Procedure
- Start by Unscrewing the brass screw.
- It holds the washer in place on the steam valve.
- Remember to remove the Brass gently.
- Once removed, take the new washer and attach it to the end of the stem.
- After that, fix it using a screwdriver.
Replace the Packing String
Look for the packing string.
If the problem lies in the packing string, replace it with a new one.
Procedure
- To replace the packing string, unwrap the old packing string consisting of graphite or Teflon.
- Purchase new strings and wrap them around the stem in a clockwise direction.
- Remember to wrap several layers on the stem.
- A fiber packing washer can also be opted for instead of packing string.
- Both have the same function to ensure a tight connection.
Testing the Faucet
- Now it is time to test the working of the hose bib.
- Switch on the water valve.
- Open the hose bib.
- Observe any leakages.
- If no leakage is present,
- hurrah! You have done a great job!
- If you notice any leakage, tighten the packing nut.
- Again test the hose bob to check for the results.
- If the problem persists, replace the whole hose bib with a new one.
Conclusion
How to fix a leaky hose bib. If your home hose bib starts leaking, don’t worry. Follow these simple steps to identify and fix the issue.
Related Guides