How to clean Keurig needle. Keurig coffee makers have become standard household items.
They’re a terrific technique for preparing a cup of coffee or any steaming beverage in a short amount of time. It, like every other domestic device, must be adequately maintained regularly.
Many Keurigs may include a tool to assist you in wiping out the machine’s minor parts. So, what are you going to do if you don’t have that tool?
Here are a couple of things you can do to wash out your Keurig instead of using the tool that came with the machine.
When frequently must your Keurig be thoroughly washed?
Cleaning out the Keurig every month or more is an excellent idea. Washing your Keurig is a perfect way to guarantee that now the tastes will remain intact.
A machine that hasn’t been adequately cleaned can harm the quality of your drinks at best. Don’t be concerned; it may not take as much time as you imagine. It simply takes 15 to 20 minutes and has a significant influence.
How to clean Keurig needle

For cleaning, follow the techniques below.
Gaining access to the needles
Switch your Keurig off and unhook it. This is a necessary precaution. Electric shock and blisters can be avoided by unplugging your Keurig.
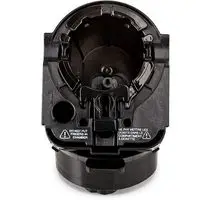
Detach the pod holder, and slowly lift the lever on your Keurig as if you’re about to put in a K-Cup to accomplish this.
Next, using one hand, hold from the top of the pod and push the holder up from below with the other.
The pod holder is just where your K-Cups are inserted.
Disconnect the sieve from either the pods holder and set it aside. With one hand, grasp the top of the pod holder as well as the funnels with another.
After that, separate the two parts.
The funnel is the portion that attaches to the pod holder’s base.
Whether this is your initial experience doing just that, you may find it hard to differentiate between these two components.
If you’re having trouble separating the two components, try and run them beneath lukewarm water to weaken the bond.
Unclogging Needle

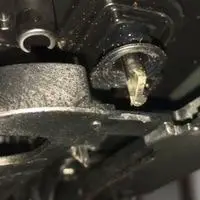
Turn the pod holder inverted to wipe the discharge needle. To soften up any jams accumulated on all surrounding exit needles, move it about for 10-30 seconds.
After that, bend a paper clip and place it inside the tiny tubes.
Because you probably wouldn’t be able to push all the way through in this tube, don’t push the issue when you come up against opposition.
Unlock the location where you put your K-Cups by lifting the brewer handle on your Keurig.
On the bottom of the upper half is the entry needle. When you examine attentively, you’ll notice that the hand has apertures on both sides.
Be cautious while cleaning the entry needle because it is very pointed.
Finish The Cleaning
Allow for complete drying of the pod clamp and funnels. After that, line up the side holes and join the two parts securely. Squeeze the components together till a click is heard.
Connect the pod holder’s hooks with the machine’s corresponding holes.
Place the pod holder; therefore, the side with two tabs is on the base, and the side with one tab is on the top. The top and center of the white arrow on the holder’s rim should be visible.
Place a large cup on the machine’s tray after it has been closed, then fill your water reservoir with water.
Start a brew cycle with the most significant cup size. And then enjoy a cup of coffee! Two water-only rinse sessions ought to be sufficient to wash off any dislodged debris.
Conclusion
In this article, we’ll talk about how to clean a keurig’s needle. Cleaning the needles on your Keurig is a quick and straightforward task that would also take no more than 5 minutes.
Only a paper clip and running water are required. Your Keurig should run fresh again, even after unclogging the needles.
How to clean Keurig needle
Related Guides