Over time, the cost of replacing your deck becomes prohibitive. For this reason, it is essential to create a regular maintenance schedule for your deck to ensure its long-term viability.
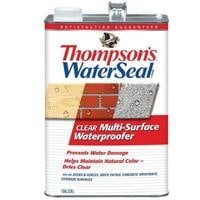
How to apply thompson’s water seal
The Thompson water sealer is an excellent choice when it comes to protecting your patio, fences, or driveways from the elements.
It can be beneficial if you protect your deck from the damage of water. The application process is simple, even if you’ve never used a sealer on the wood before.
Step1: Workspace Preparation
Before you can begin, you must clean all of the workspaces thoroughly. As a result, you’ll be able to apply the sealer faster for the very first time around.
No one enjoys working in an untidy place. Keep in mind that the environment influences your productivity.
Step 2: Wipe the Surface Down
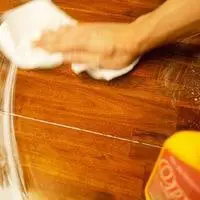
Before applying Thompson’s water seal, you must clean the wood’s surface.
It will reduce the risk of the paint pad becoming clogged while it is being used.
As a result, you must first clean your work surface thoroughly.
The Equipment and Supplies You’ll Need
- Use a rag or microfiber cloth to clean your surface
- Microfiber or a rag have to be dampened with water.
Actions to be taken
- Dampen the microfiber rag or rag with water.
- It would help if you rubbed the microfiber back and forth on the surface.
- Wait for the surface to dry before moving on to the next step.
Step 3: Clean unfinished wood
Microfiber cloths or rags are best for cleaning. Maintaining an unfinished wood surface by wiping it with a damp microfiber cloth can cause it to warp.
To see if your wood is unfinished or finished, simply add a few drops of water to the surface. It’s unfinished if you notice absorption and a mark on the surface.
Actions to be taken
- Repeatedly wipe the surface with a microfiber cloth.
- Keep repeating the procedure until there is no trace of dust remaining.
Step 4: Applying Thompson’s Water Seal
Whether you use a paint pad or a sprayer, it is entirely up to you. Because of this, their recommendation says to use a garden sprayer to apply the sealer on the can.
The Equipment and Supplies You’ll Need
- Seal of Thompson’s Bay
- Spraying the sealer with a garden hose
- Wear long sleeves, sunglasses, pants, and safety goggles to protect your skin from harmful chemicals.
Actions to be taken
- Before applying the Thompson water seal with a sprayer, put on your protective gear.
- Remove the tube from the plunger.
- Start filling the spray can go halfway with Thompson’s water seal after thoroughly mixing the product.
- It would help if you replaced the damaged plunger tube.
- Tighten it up a little bit to the point where you feel a little bit of resistance. It should not be too tight.
- The plunger now needs to be pushed in and then released.
- Pump it up to the point where you feel resistance.
- When you feel resistance, don’t pump too hard.
- You should spray the Thompson water seal liberally on your deck.
- Let it air dry for a few minutes. After 24 hours, the deck should be completely dry.
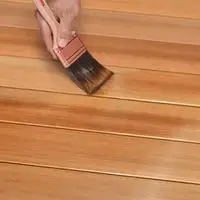
Step 5: Use of a Paint Pad
Only one application method for Thompson’s water seal has been shown to you so far. When applying your product, you may prefer to use a paint pad, roller, or sprayer.
While a sprayer can be the most efficient way to get the job done, you can go with a roller or paint pad if you don’t want to break your bank.
The Equipment and Supplies You’ll Need
- A paintbrush to apply the sealer to the surface.
- Seal of Thompson’s Bay
Actions to be taken
- Seal the deck with the sealer.
- Using a sealant, paint a seal on the pad.
- The seal should be placed on the tray.
- Start in the middle and work your way out.
- Do not apply the sealer in a random pattern.
- Wait a few days for the complete drying of the deck. thompson water seal drying time is approximately 24 hours. Ensure you don’t get water on the sealer while it’s still pliable.
- Drying times are discussed in the sixth step
- Wait at least 24 hours before moving on with your day. Drying time can vary depending on weather conditions.
- If you plan to paint all over it with latex paint, you should wait at least about 45 days.
FAQ
How to apply thompson’s water seal to concrete?
Brush or roll the product onto a hardened concrete surface as an alternative to spraying.
For vertical surfaces, start at the bottom and work upward. For concrete curing applications, use it at a rate of 1 gallon per 200 square feet.
How to apply thompson’s water seal to brick?
Use a brush, roller, or quality sprayer, and starting at the top and working down, apply a coat of sealer to each brick. Be sure to coat the mortar joints as well.
Remove excess drips or run with a brush or roller. If you have applied one coat but feel it is necessary to add another in order for it to look well-coated, this is acceptable.
Allow drying time between coats as suggested on your sealer’s container.
How long does thompson’s water seal last on brick?
If applied correctly, Water Seal should last up to 4 years before it needs to be re-applied. Water Seal can only be used on surfaces that are bare and uncolored. How long will Water Seal last?
Can you apply thompson’s water seal to wet wood?
Waterproofing Stains can be applied to damp wood, so you only have to wait about two hours to begin applying stain.
However, other products require that your wood dries for 48 hours before applying moisture-resistant stains and paint.
How long does Thompson’s water seal take to dry?
Allow at least 24 hours to dry. However, drying time will vary depending on the substrate, temperature, and degree of humidity.
When completely dry, perform the splash test to determine if a second coat is necessary. Wait exactly 45 days before applying the first layer of latex paint over Thompson’s WaterSeal.
How long does the Thompson water seal take to dry before the rain?
Thompson’s WaterSeal should be dry in 2 hours. Recovery time will vary depending on the texture and porosity of the surface being treated.
Surface or weather conditions may affect drying times – but remember that we designed our formula to remain flexible even under adverse climate conditions.
Related Guides