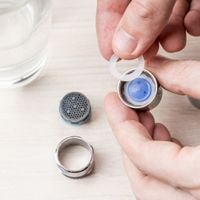
Cannot remove aerator from faucet. Aerators are the fundamental fixtures that mix water with the air to reduce water flow. Aerators are fitted at the end of the sinks Faucet.
Research says that aerators save up to 30% of water flow and about 15 to 16 gallons of water per day. An aerator is used to prevent the assemblage of mineral residues and dirt particles.
But sometimes these mineral residues and dirt can block the aerator, and the aerator can get clogged, and then you have to remove it for cleaning purposes or replacement Maintenance of the aerator is an essential step to keeping going smoothly with your faucet.
It is recommended to change, clean, or replace the aerator once every year.
But sometimes, when you try to change the aerator, the aerator gets stuck. Here are some possible reasons for a stuck aerator.
Cannot remove aerator from faucet
Reasons to remove an Aerator
Mineral residues
Aerators are fitted to keep mineral residues which over time make aerators clogged and become a hurdle to remove.
Dirt and trash
Aerator stores dirt and trash in any condition because it doesn’t matter whether aerators are new or old, they will surely get stuck because of dirt and debris, so it is highly advised to clean your aerator routinely so that aerator can function properly.
Corrosion:
Some aerators come with material that gets corroded easily and can block the water flow. If your aerator gets corroded or rusted, then clean it and wash it with vinegar.
Old Aerator
Dust, Rust, and Mineral residues get stuck in the old aerator and stop or lower the water supply, and when you try to remove the aerator, it won’t come off.
Replacement:
You have to change an aerator, and the reason could be Corrosion, dirt or trash, mineral residues or your aerator is old. You have to remove it at any cost.
Tools You’ll Require
To start the fixing process, You’ll need these types of equipment
- Channel-type pliers
- Hairdryer
- Stuffy brush
- Skewering oil
- Lime-dissolving solution
- Heat
- Vinegar
- Rubber Wrench
- A piece of cloth
Fixing Process to Remove a Faucet Aerator that is Stuck
Step 1: Collect the Required Tools and Equipment
There are a lot of tools that are required to start the fixing process. Make sure to gather all the required tools and equipment.
Step 2: Encircle Your Sink’s Drain
Cover your sink drain with a piece of cloth because, during the fixing process, there are a lot of screws and parts of the faucet/ and your sink will fall. To keep them captured.
Covering the drain with a cloth will not only help you to capture faucet parts but also prevent them from breaking down.
Step 3: Operate using your Hands to Release the Aerator
You can remove the stuck aerator using your hands but make sure to grip it tightly, and then simply pushing some force will help you to release the aerator with your hands.
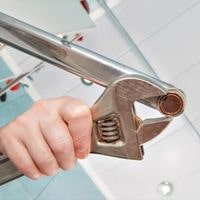
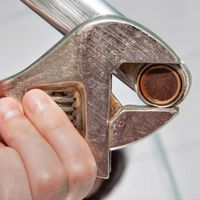
Step 4: Use Pliers
If an aerator is not coming out with your hands, then use pliers but first, make sure to cover the aerator with a piece of cloth to prevent it from scratches and damage.
If you are replacing the aerator, then there is no need to cover it with a cloth. Catch the aerator using pliers within the screws.
As the aerator is made up of very thin metal, then it can easily be trapped and bent down by grabbing it tightly. It is going to be a bit crucial and risky because holding a little extra force can break the aerator.
Step 5: Operate with the Rubber Wrench
Use a rubber wrench to tighten the aerator more tightly because the rubber wrench doesn’t slip easily. Twist the aerator in one direction while holding it with the rubber wrench, then twist it in the other direction.
Step 6: Remove Aerator with Heat
Now, if the rubber wrench doesn’t work for you to remove the aerator, then apply some heat.
As aerators are made up of thin metal, they apply a limited amount of heat, such as the heat of the aerator with the help of a hairdryer or some hot glue.
Applying heat will loosen the aerator, and then use pliers and a rubber wrench to remove the aerator.
Make sure to apply heat only on heat-resistant aerators because some aerators are made up of plastic.
Step 7: Use Vinegar
If the aerator doesn’t come out while doing the heat process, then use vinegar. Aerators get stuck because of dust, debris, rust, and due to mineral residues. To release such aerators, use vinegar.
Put vinegar in a zip lock bag and then put the aerator down to it for a few hours to loosen it properly.
Related Guides