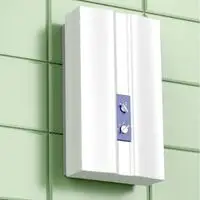
Tankless water heater expansion tank. Tankless water heaters are heaters that do not have a tank. The water is heated instantly as the water flows through the device and pipes.
They do not have a tank. So, it does not have any water stored in it except the water that is flowing through the pipes or the coils of the heat exchanger.
Tankless heaters having a variety of pros, are getting more and more common these days. They are easy to use and install, and they are not too expensive, so they meet the criteria of all normal users.
This has increased their demands a lot. This type of heater is much more reliable than the ones with tanks, even using the same type of fuel.
Tankless water heater expansion tank
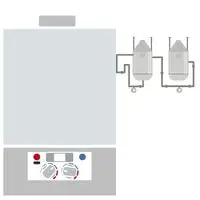
Tankless water heaters do not require the use of a tank, as their function is to directly supply the water, and the water is heated during its travel.
But it is not impossible to add an expansion tank to it. You can add the extension of the tank, and it will become more useful.
When your device is not working, you will already have storage of hot water, so you will have nothing to worry about at all.
You can use the water whenever you desire. You can do everything, even if the device is not working.
Install an expansion tank with a tankless heater
If you don’t have a tank installed, you can’t use it. You will probably need a tank if you want to store hot water. You can actually install the tank by yourself if you follow the steps given below.
Removing and disconnecting
Removing and disconnecting here refers to the removal and disconnection of the power supply and the water coming through. To stop the power supply, you just need to turn off the power from the mainboard.
Through this, no power will reach the heater. And to turn off the water by switching the valve supplying the water to your house. It is a simple process. You can find the valve in the water supply pipes.
Getting the accessories and expansion tank
To add an expansion tank, you need an expansion tank. You need a matching tank that suits your heater.
Check the size of the tank twice and the model number just to make sure. Beware of the scams the plumbers pull by changing stickers.
Check the cold-water line
You need to choose the water line that you want to connect with the unit.
It is mostly the cold-water line that is on your wall horizontally placed. Still, make sure that you have selected the correct pipe; otherwise, problems will be used you.
Setting the expansion
Make holes with drills on the walls. Then set the heater as close as you can with the pipe. Then attach the pipe of the cold water with the device.
After connecting or attaching the supply line, use the screws and tighten the device where you drilled the holes. This is so that it won’t fall.
Attaching the heater and tank
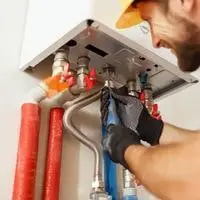
At the bottom of the expansion tank, you need to reach the connector.
Then use the plumbing tape to wrap it up, then attach the tee fitting and the connector together.
Then use a wrench to tighten it a bit. Remember not to use too much force.
Restoring the supplies to the heater
Turn the valve on to restore the water supply that you had stopped. The waster will start moving. Then you need to bring the power back.
You can do this by turning the main power board on again. The power is needed to start the device.
Checking if the tank is working
After completing all the steps of setting the expansion tank and then turning the water and electricity supply, we need to see if the expansion tank is usable or not.
Try using the tap related to the tap and see if it is working or not. You need to wait a few seconds before the warm water, as you say, comes out.
If the tank is working, you have completed your task. If not, you must have done something wrong. Just follow the steps again and see if it works if not, call a plumber.
Conclusion
The setting of the expansion tank is really easy even f we do it by ourselves. You can call the plumbers if you dislike work.
Though the method is saving you a lot of money. As for the installation, the cost is free because you did it by yourself.
Related Guides