How to vent a dryer in the middle of the house. The dryer is a necessary component of any household. Consider that for a moment.
This would require an entire day to dry so much of the clothing in the apartment without a drying machine. That might need a significant amount of your work and attention.
Furthermore, a drying machine can dry the garments despite requiring ideal atmospheric conditions.
You don’t have to bother over your clothes drying and being prepared to utilize it whether it’s warm or rainy.
Laundry is also made simpler by using a dryer appliance since it enables the clothing to retain residual wetness, allowing it simpler to press them.
Washing appliances and dryers are frequently placed in odd places in ancient properties due to their uneven designs.
This might sometimes result in your laundry room being in the center of the home.
How To Vent a Dryer in the Middle of the House
Read through as we look at securely:
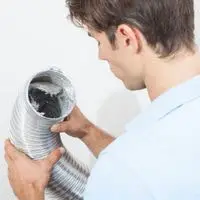
Installing the Primary Venting Connection
If possible, detect the first venting tube that runs thru the flooring over a prior exhaust. Something more, everything should shift a little.
As nearly as possible, position the tube so that it seems to be at a 90° angle.
Align this to the drying machine and connect the back half of the line, ensuring the tube fits. If it doesn’t match, return to the retailer and purchase one that will do.
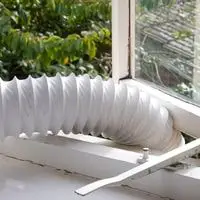
Installing the next periscope
Proceed to the bottom floor right now. Make that the central periscope is still correctly hung. Currently, the following section of the periscope is required, and they must be combined.
Connect the upper portion end of the preceding one to the bottom end of the earlier one, such as the dryer’s component.
After you’ve completed this section, the successive periscopes’ bottom openings should appear to be in the opposite direction of the finest version linked to the dryer further above.
Start Sealing The Periscope
Attach the periscope with splashing foam insulation. So when the dryer is running, this will come in handy. Ascertain that the section of the sealer does not kill the airflow. Spray it on the outside of the duct rather than inside.
PVC should be used
This stage is mainly dependent on the arrangement of your home. This stage will be divided into two portions:
- Portion 1
We’ll assume you have a ½ or basement with enough area of using PVC for going outdoors.
There is some good news: your structure will be limited by the potential of shape and temperature.
- Measure the additional periscope’s entrance.
- Attach the PVC to the first drive exterior and allow it to run entirely.
- Provide around 5′′- 8′′ of covering on the exterior for proper warm evacuation.
To keep insects out of the PVC wire, attach a lattice or tie the boundary to the end.
- Portion 2
We recognize that your basement does not have access to external ventilation. In any scenario, PVC should be included. You won’t, however, be operating it outdoors.
In any scenario, 4′′- 6′′ inches PVC would be enough. Attempt to position the PVC to fall over the periscope’s wide bottom end and is measured downwards.
You may decide to put a jug of liquid beneath the PVC if you have adequate room. Following these pipes, excess build-up might contaminate water, reducing the risk of a disaster caused by ventilation.
Conclusion
This is the end of this article. Ventilation is a vital aspect of the dryer’s functioning. The finest airflow is with a structure on the outside.
Related Guides