How to replace wax ring on toilet. There is no need to replace a wax ring for 20 to 30 years. They can still get damaged and require to be changed.
At the base, if you see water seeping out of it. Then it means water is leaking. Water stains present on the ceiling and on the floor also mean the same. If there is a heinous odor, it also shows damage.
I thought that my wax ring would last a lifetime. But the leakage shows I was wrong. So I asked my friend for advice, and he told me to replace it.
Then, with research, I found the way. The same way that was useful to me is down below.
How to replace wax ring on toilet
Suppose your toilet wax needs replacement. You came to the right place. Clearing the drain. That is the first. Turning off and flushing the water will serve as the base.
Then during is done to save from damage. After that, the toilet itself is removed. By knife or scraper, the wax ring can be removed.
The new part is placed in its position. Fixed and ensured that it is tight. The toilet is placed back on the additional part. It is then fixed too. The water is turned on and tested.
All explanations of the steps are presented in the article.
Requirements
- Wrench
- Screwdriver
- Bucket
- Knife
- Damped cloth
- Towel
Steps
To ensure correct installation, follow the steps.
Removing water supply
The water supply can be turned off from behind the toilet. But it is good to shut the chief supply. Turn the handle or the valve for this.
Flushing Several times will drain all the possible water from the bowl and the tank. You can use a towel to try it or a vacuum to suck the water droplets.
Now disconnecting the line. You can do this by detaching the pipes from the tank. Some water may remain, so use the bucket and gather the water in it. Dryness is necessary.
Removing the toilet

Now the toilets need to be removed. First, you need to look for the bolts. They are at the base. There are caps present on them. Remove the caps.
This needs to be done to reach the bolts. Now, with a wrench, you remove the bolts and the washer from the base.
There is nothing keeping it attached except the old ring. Just shake and twist, and the toilet will get loose. You now need to lift it, so get a grip at the center.
The weight should be balanced so that you don’t drop it. Lift it by putting the weight on your legs straight up rather than on your back.
Cleaning
This part is scraping. Use a knife or a scraper to remove the remains of the old wax. Remove from under the toilet. Scrap from the floor fitting as well.
The part is called a flange, and it is like a pipeline. Completely Clean and dry it. Make sure the flange works and is not damaged.
Installing a new one
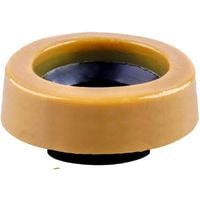
Now get a new ring. The size is the same, but the design can differ. Check the instructions written on the packing in case of a difference in design.
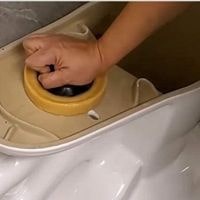
At the Flange or bottom of the toilet, fix it. Choose either. Apply adhesive on it. If it already has adhesive, then there is no need for it.
After centering it, Place the toilet back on the flange as carefully as possible. Make sure the bolt and the holes in the floor will align. Now place the washer and the bolts. Tighten them with the wrench. Put the caps back on the bolts.
Connect the water supply line back to the tank. Attach it and turn the supply on. Move the handle or valve in working opposition.
Let the water fill and then flush it to see no water leaking. Check the base and make sure no smell is coming.
Conclusion
The smell can be disgusting, so wear a mask. Use gloves, so you don’t get the germs. Now you can rest easy, at least for a decade.
Quality should be good if you want it to work for a long time. The toilet should be handled carefully while lifting.
The topic must’ve helped you somehow. It’s your choice whether you want to hire a professional or want to do it yourself.
Related Guides