How to change drill bit black and decker. Don’t know how to change the drill bits?
Suppose you are having difficulty with your new drill while replacing drill bits black and decker. No need to worry about it.
We are here to provide a detailed guide on how to change the drill bits. Follow the step-wise procedure for different drill bits.
How to change drill bit black and decker
Having the right drill bit for the job is so important.
Whether it’s keyless or keyed, changing out drill bits when you need to take care of a DIY project is so simple and easy.
In just a few minutes, you’ll be ready to start drilling.
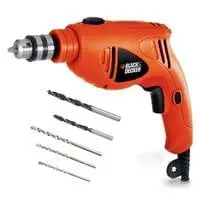
Types of Drills
There are two standard types of black and decker drill
Cordless drill
The cordless drill comprises a keyless chuck system.
Corded drill
On the other hand, the corded drill utilizes a key that is used to connect the splines on the chuck.
Let’s get started by following procedures for both types of drills.
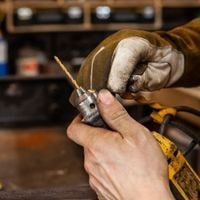
Procedure for Changing Corded Chuck Drill Bit and Decker
- If you have a corded chuck drill, follow the step-wise procedure to change the bit efficiently.
- Remember to maintain proper safety guidelines before opting for any method.
- Take out the drill and release its trigger.
- Wait for a few minutes until the drill completely stops.
- After that, unplug the drill.
- Once the drill is unplugged, look for the black-colored key. You can find it connected.
- It’s connected With the cord of the black and decker drill.
- (Locate the key-cord connection).
- After the key and cord engaging site is located, you will Observe a knob on the key’s top part, with surrounding gear teeth.
- The next task is to find a round hole on the chuck’s side. You can find it somewhere in front of the chuck’s gear teeth.
- Take the key’s knob and place it inside Chuck’s hole.
- The keys knob and chucks hole gear teeth should mesh with each other.
- Ensure the drill stability while turning the handle in an anti-clockwise direction.
- It causes the detachment of the bit and chuck. You will notice the drill bit starts to detach at a certain point.
- Maintain a firm grip and remove the black bit from the chuck site.
- Remove the drill bit and place it aside.
- Once you take out the old one, install a new bit by rotating the bit in a clockwise direction.
(By this simple procedure, you will efficiently replace a keyed drill bit, Black and Decker).
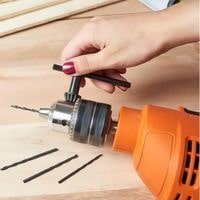
Procedure for Changing Cordless Chuck Drill Bit and Decker
- If you own a cordless drill, follow the below procedure for changing its black bit with ease.
- Let’s get started!
- Find a switch on the drill’s trigger part.
- This switch indicates the opening direction of the dill.
- Rotate the switch in an anti-clockwise direction for opening the drill.
- Grasp the drill with both of your hands.
- Hold the drill with one hand while using the other to hold the cordless chucks sleeve portion.
- Now press the trigger and switch off the drill.
- Wait for a few minutes until the drill completely stops.
- Remember to avoid pulling the trigger while the chuck is opening.
- Observe the drill bit; it may fly out.
- Once the bit falls out, take a new one and place it in the drill.
- Insert the drill bit in such a way that the cutting tip of the bit should be towards you.
- Rotate the drill sleeve in a clockwise direction.
- Keep rotating until the bit is held secure.
Conclusion
If you own a drill but don’t know how to change the black bit and decker, follow this handy technique to make the process easy.
Identify the type of drill you own and select the method that best suits it. Grab the drill, and replace the bit with a new one.
You have changed a bit. Maintain proper safety while dealing with any device.
Related Guides